No card is needed to create a store. Every new store starts on the Grow package with the first month included, so you can set everything up before paying. While you build, your shop is password-protected ("In development"): visitors see a coming-soon page until you remove the password in the last step. This walkthrough was verified on a fresh store; the screenshots come from that run.
Choose a package and create your account
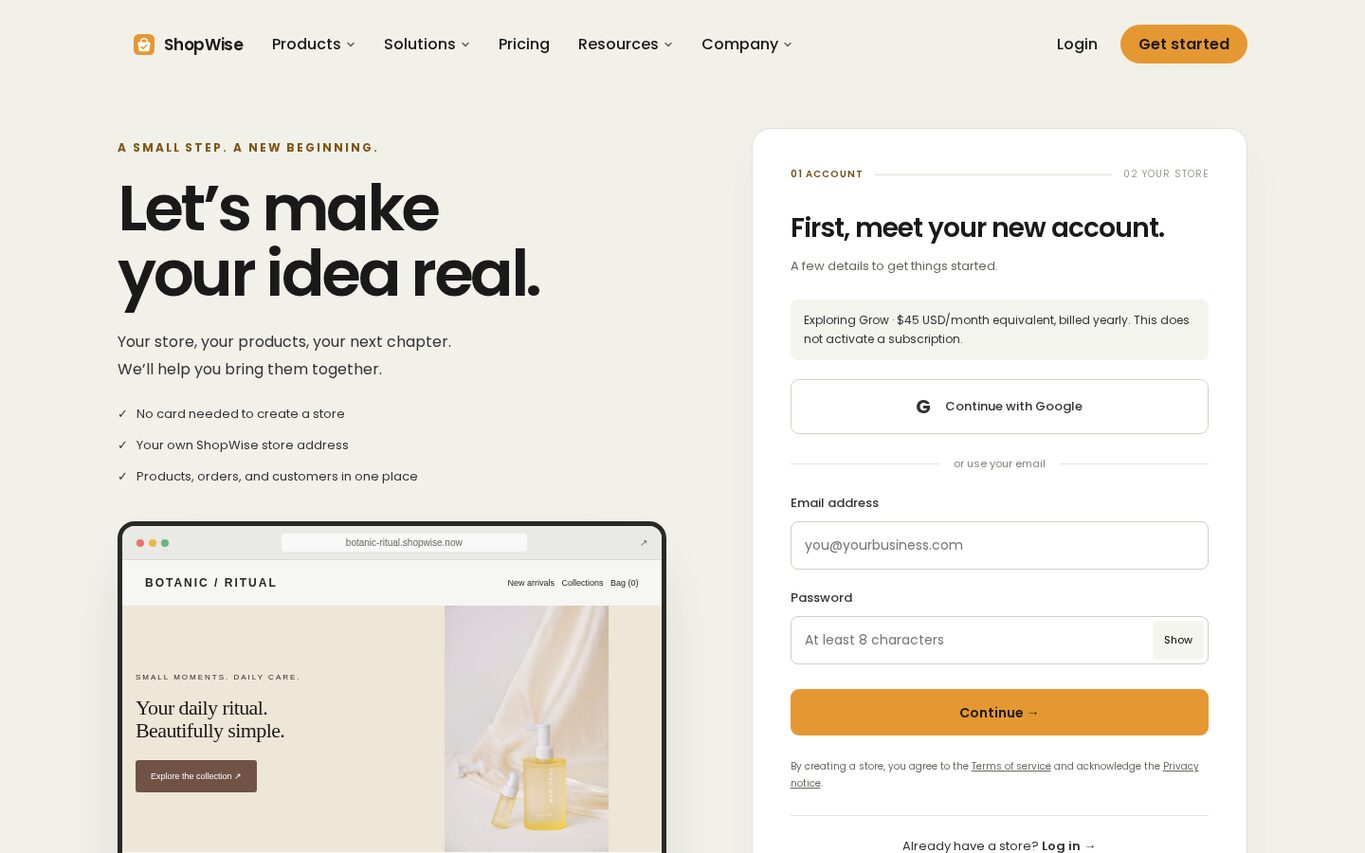
Go to Pricing, compare the packages and click "Choose Basic", "Choose Grow" or "Choose Advanced" (Plus is a custom agreement: use "Talk about Plus"). On the signup page enter your email and a password of at least 8 characters, then click "Continue". You can also use "Continue with Google". The chosen package is shown for reference only; nothing is charged at this point.
Name your store and pick its address
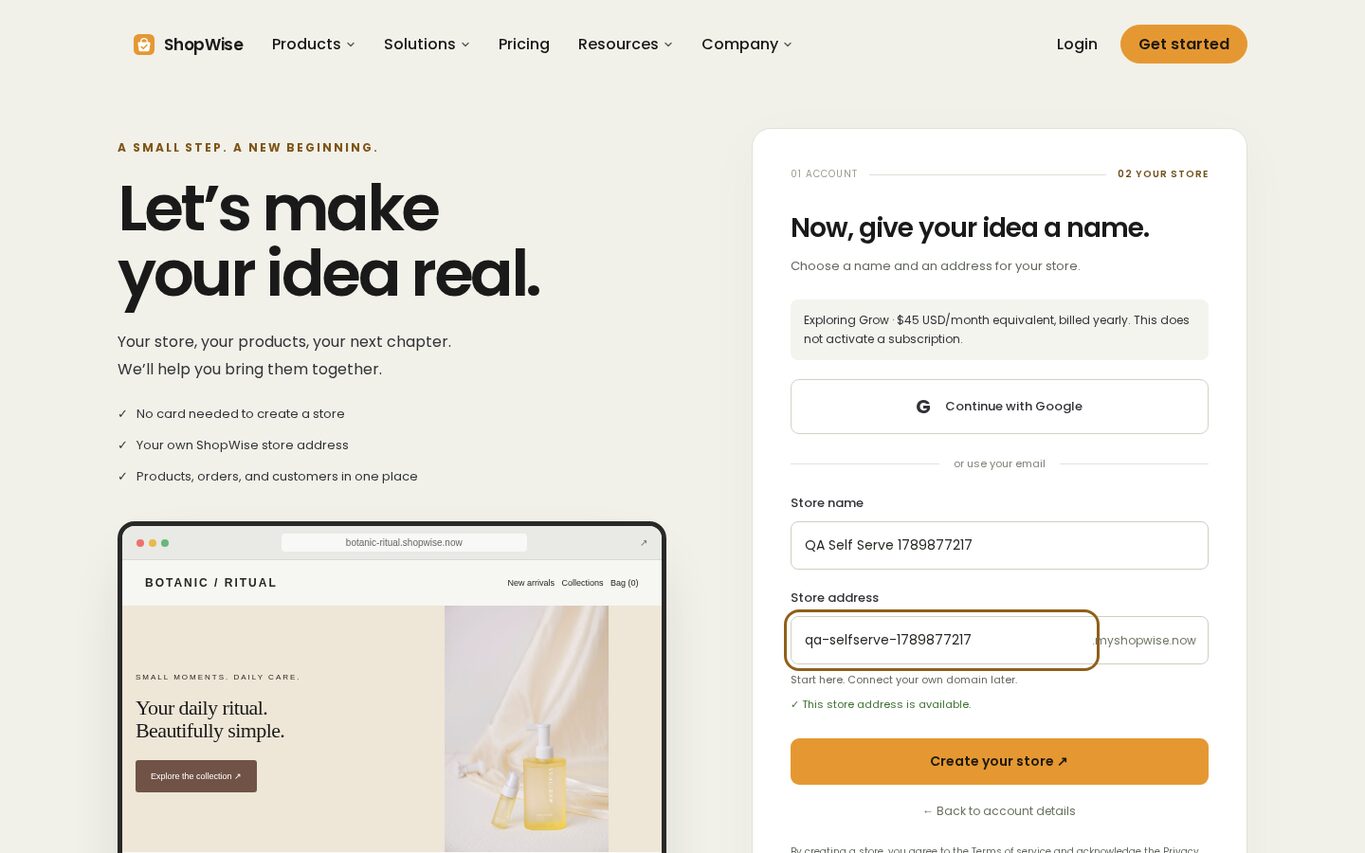
Enter your store name and a store address made of lowercase letters, numbers and hyphens. The page checks availability as you type; wait for "This store address is available", then click "Create your store".
Land in your admin
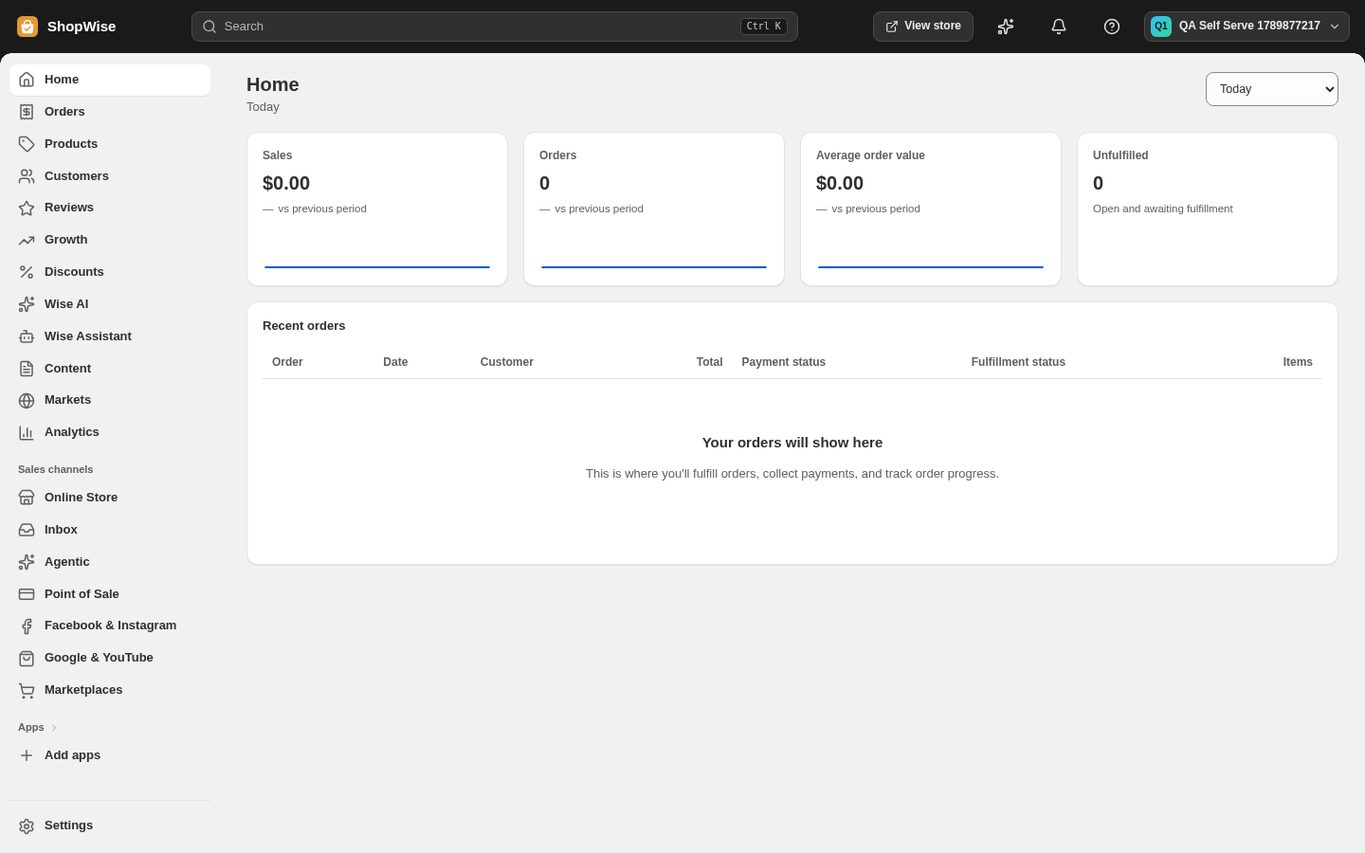
You are signed in and taken straight to your admin at admin.lulu.us.com/store/your-address. Your shop lives at your-address.lulu.us.com. The Home page shows sales, orders and unfulfilled orders; the sidebar holds Products, Orders, Online Store, Apps and Settings.
Choose and pay for your package
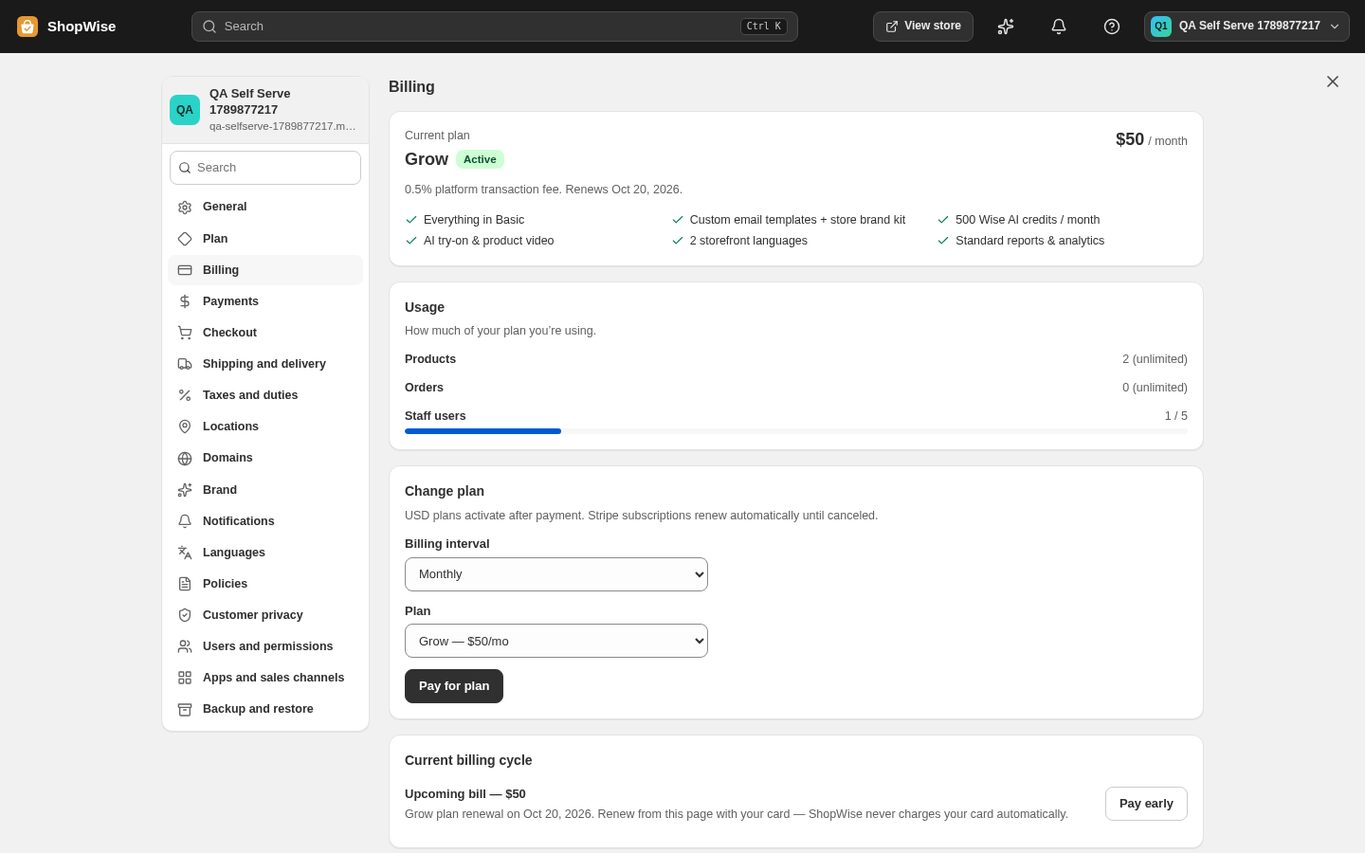
Open Settings > Billing. The top card shows your current package, its renewal date and the platform transaction fee. Under "Change plan" pick the billing interval and the plan, then click "Pay for plan" and pay in the payment window. Nothing is switched until the payment succeeds, and Lulu never charges your card automatically.
- Full details: Pay for your package (linked below).
Add a theme
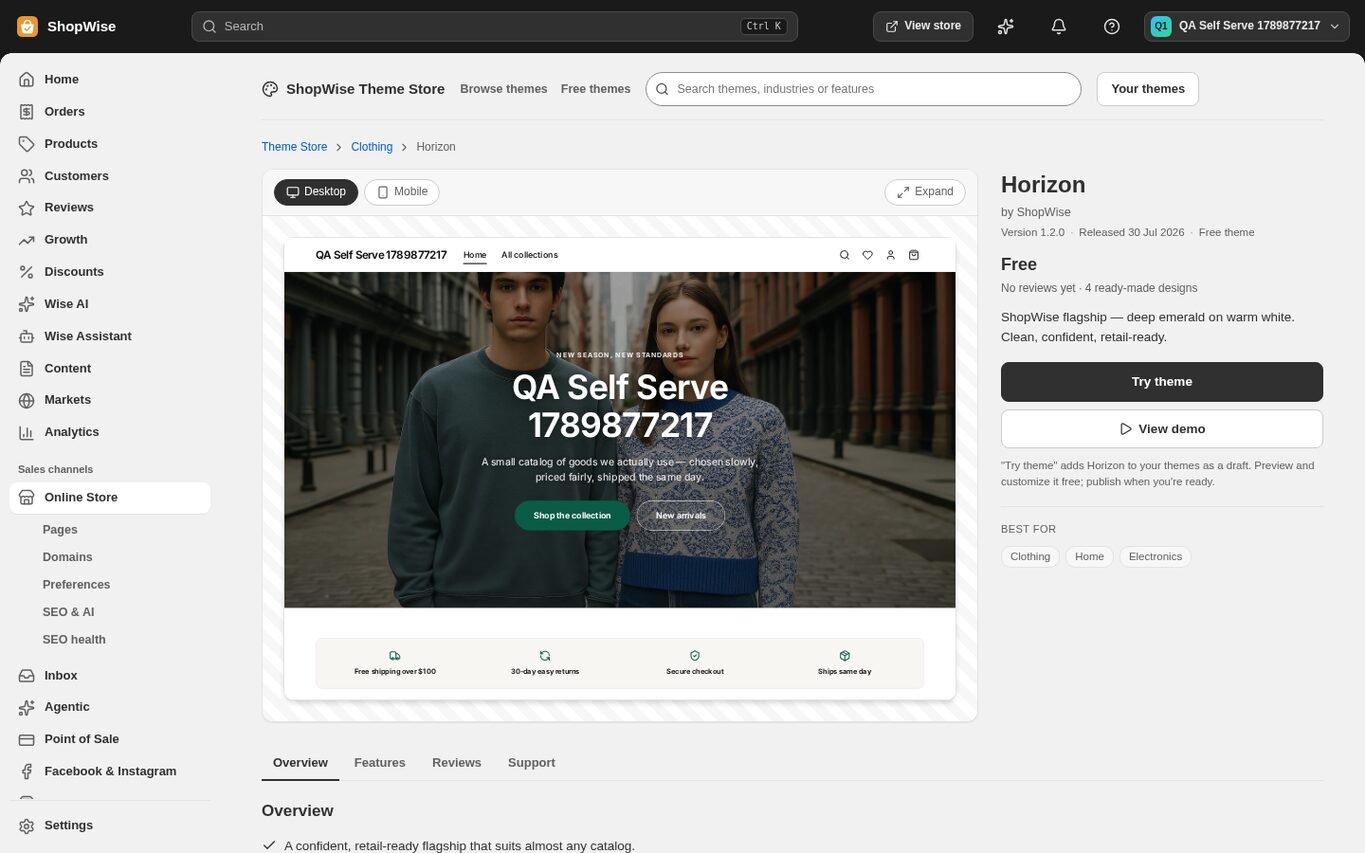
In the admin open Online Store, click "Visit Theme Store", open a theme and click "Try theme". It is added to your drafts; click "Edit theme" to customise it and "Publish" when it is ready. Free themes publish immediately. Premium themes can be tried and edited free and are bought only when you publish.
- Full details: Try, buy and publish a theme (linked below).
Add apps
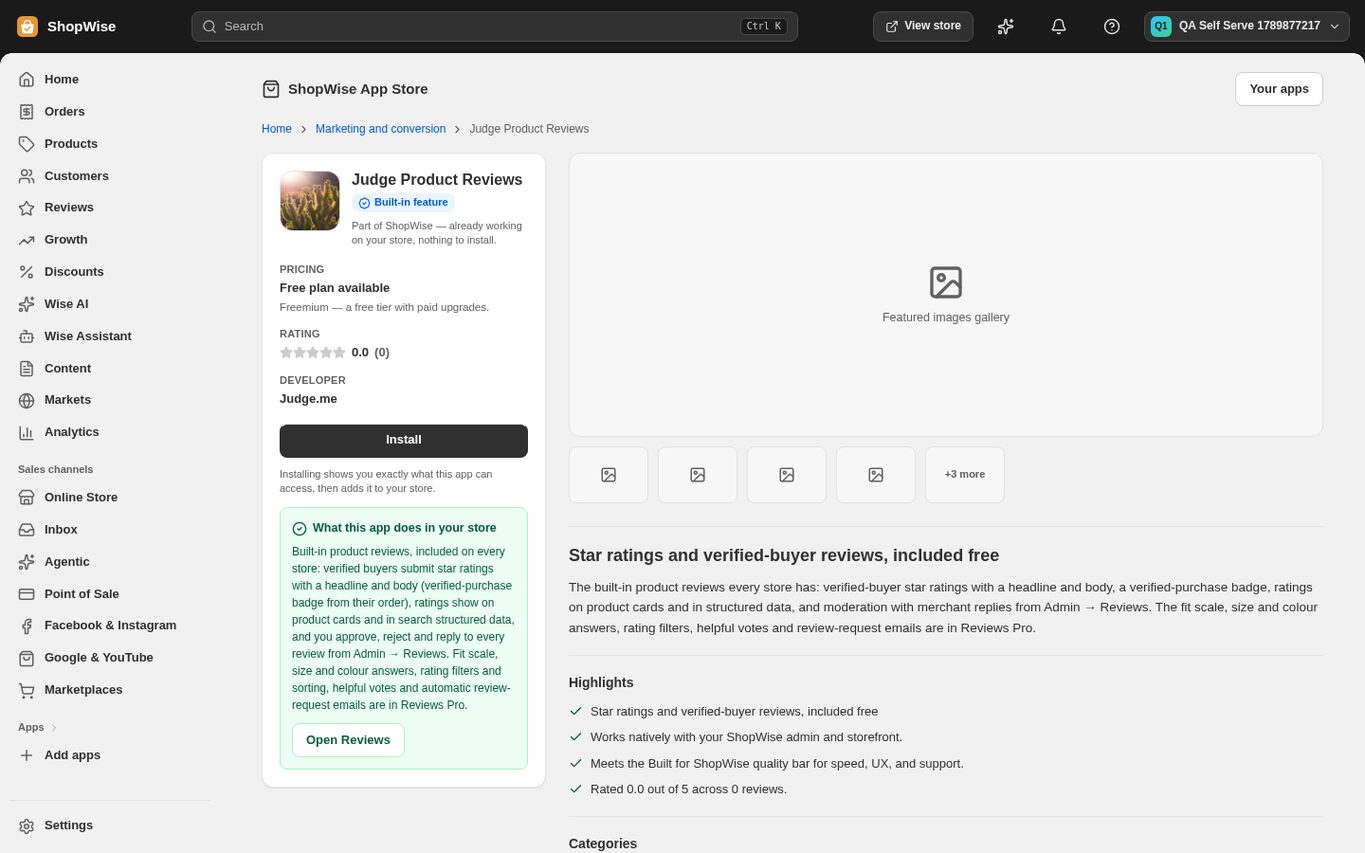
Open Apps > Add apps (or apps.lulu.us.com), open an app and click "Install". A confirmation shows what the app does, which data it can read or edit and what it costs before anything is added. Apps with plans start on their free tier; a paid tier comes with a 14-day free trial the first time, no card needed.
- Full details: Install apps and pay for app plans (linked below).
Go live
Add products under Products > Add product. Set up Settings > Payments with your own gateway (PayHere, Koko, Mintpay, WebXPay, Stripe, PayPal or cash on delivery) and Settings > Shipping and delivery. Connect a domain under Settings > Domains, or keep your-address.lulu.us.com. Finally remove the store password under Online Store > Preferences: your shop is public.
- Products > Add product
- Settings > Payments and Settings > Shipping and delivery
- Settings > Domains (optional)
- Online Store > Preferences > remove the password
CHECK YOUR WORK
You’re ready when…
- You can sign in to admin.lulu.us.com/store/your-address.
- Settings > Billing shows your package as Active with a renewal date.
- A theme is Live under Online Store and at least one product is published.
- Payments and shipping are configured and the store password is removed.
IF SOMETHING DOESN’T LOOK RIGHT
Troubleshooting
The store address I want is taken or reserved.
Choose another address; it only affects your free lulu.us.com link. You can connect your own domain later under Settings > Domains.
The payment window says the payment could not start, or closes without a result.
Nothing was charged and your current package, theme or app tier stays exactly as it was. Try again in a few minutes. If it keeps failing, the platform's card payment provider is not live yet for this region: contact support with your store address and what you were paying for, and the team will complete the activation with you.
I cannot find this page or action.
Check the store shown at the top of the admin. On a phone, open the navigation menu first. Ask the store owner to confirm your permissions and whether the feature is available for this store.
What should I send support?
Send your store address, the page you were using, the steps you took, and the exact error text. Include a screenshot with private customer details hidden. Do not share passwords, API keys, or full payment information.
Keep going
- Connect an existing domain →
- Connect a payment provider →
- Test your store before launching →
- Pay for your package →
- Try, buy and publish a theme →
- Install apps and pay for app plans →