



Build apps and themes from start to finish
The complete partner path: create a dev store, build a theme in the real theme editor, export and submit it, propose an app listing, get through review, then maintain, update and support what you published.
Download this guide: PDF · Word (.docx)
On this page
- 1. Sign in to the partner portal
- 2. Create a dev store
- 3. Open the store admin
- 4. Pick a built-in theme to start from
- 5. Build the theme in the theme editor
- 6. Download the theme file
- 7. Start a theme submission
- 8. Choose where the theme comes from
- 9. Fill in the theme listing details
- 10. Send the theme for review
- 11. Understand what an app is here
- 12. Propose an app listing
- 13. Save the app draft and submit it
- 14. Follow the review status
- 15. Act on a rejection
- 16. Find your published listing
- 17. Complete the theme listing
- 18. Add release and support details
- 19. Update the published theme
- 20. Maintain the app listing
- 21. Use app version history
- 22. Read and answer merchant reviews
- 23. Ask a merchant for a review
- 24. Work in a merchant's store with collaborator access
- Completion checklist
- Troubleshooting
You need an approved partner account (see Register as a partner) and about half an hour. Everything here happens in two places: the partner portal at partners.lulu.us.com, and the ordinary store admin at admin.lulu.us.com, which the portal opens for you. You can build a theme end to end yourself. An app, on this platform, is a listing in the App Store: the portal publishes its description and pricing label, while the working integration, the store data it may use and any paid plans are set up together with the Lulu team.
Sign in to the partner portal
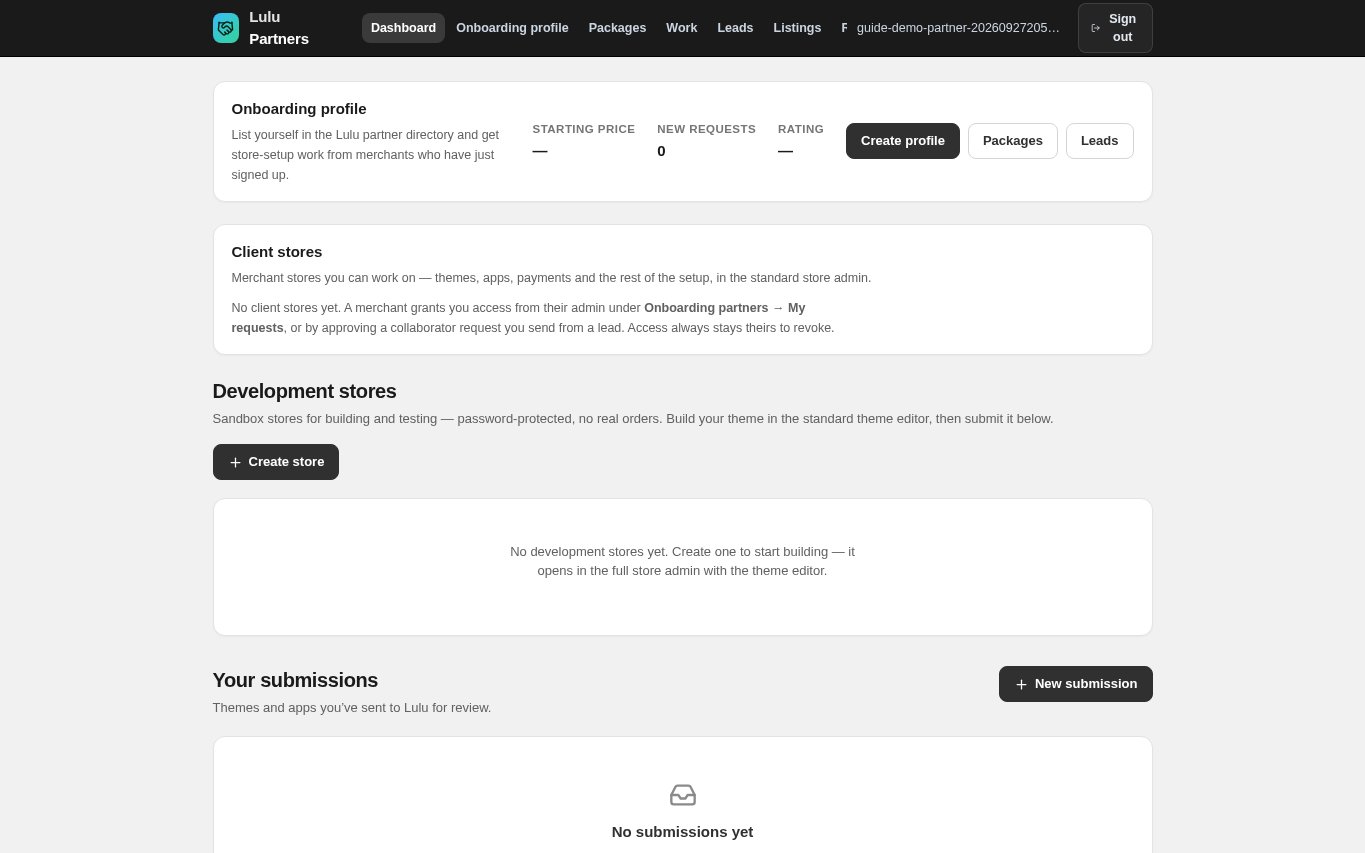
Go to partners.lulu.us.com, enter your email and password on the Sign in tab and select Sign in. You land on the Dashboard.
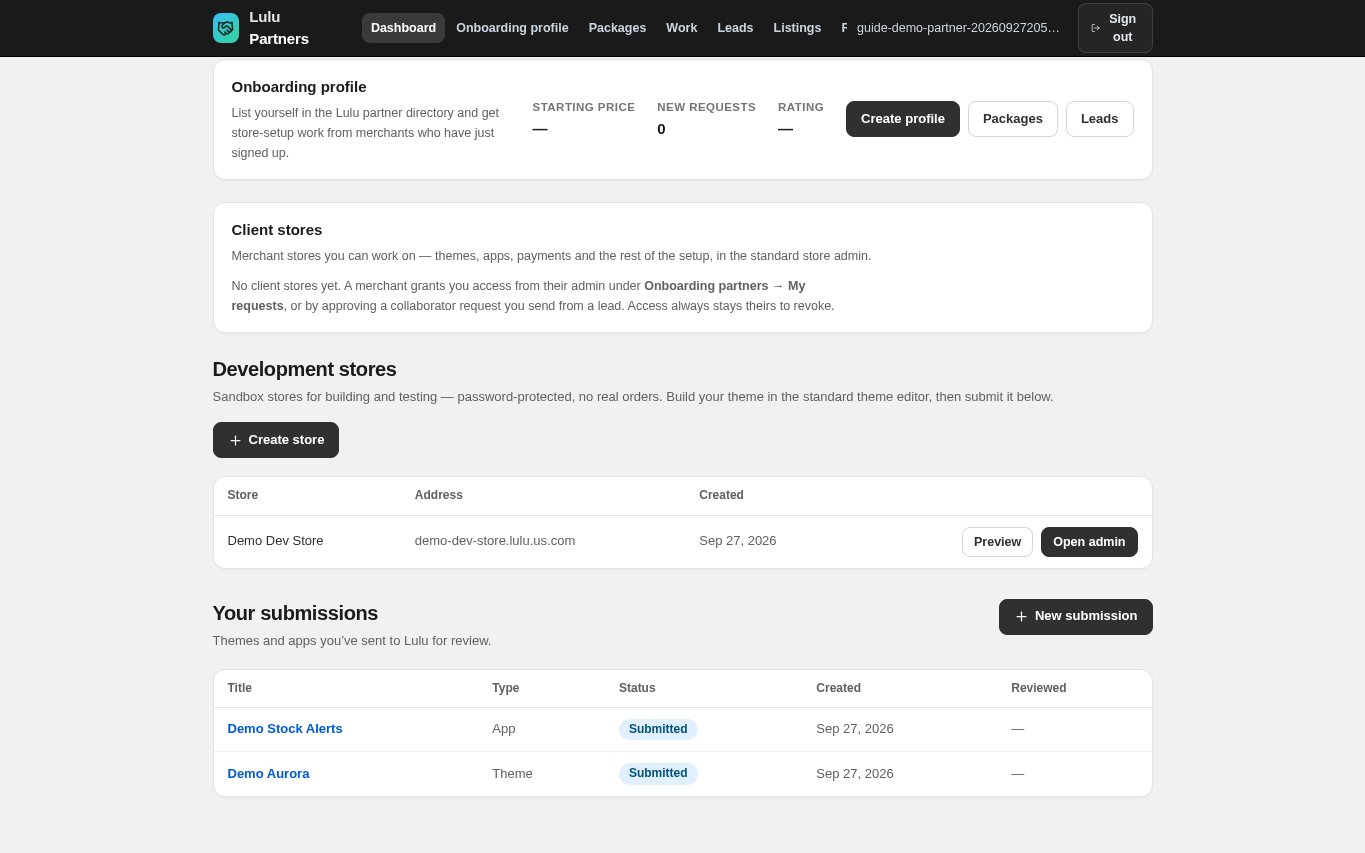
- The Dashboard lists, from top to bottom: Onboarding profile, Client stores, Stores and Your submissions.
- Themes and apps both start from this page.
Create a dev store
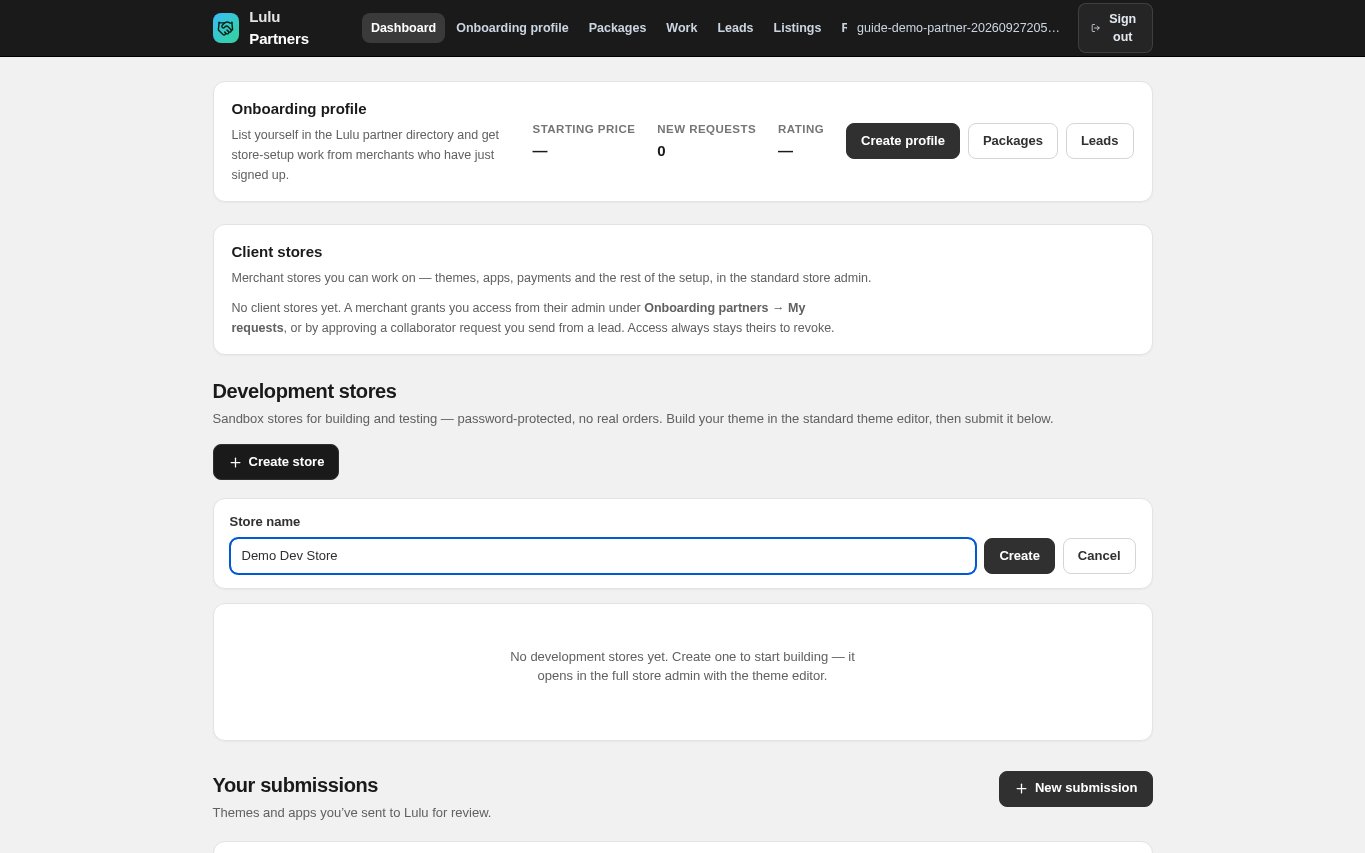
Under Stores select Create store. Choose Dev store, pick the Plan features it should have (Basic, Grow, Advanced or Plus), type a Store name (2 to 60 characters) and select Create.
- A dev store is a real Lulu store for building and testing themes and apps. Search engines are kept out and a sample catalog is added for you.
- The store address is made from the name, for example demo-studio-sandbox.lulu.us.com.
- Its storefront is always password-protected, and the password can't be turned off. It takes test orders only: no real payments, gift cards or store credit.
- A dev store can't go live and can't be transferred. To build a store for a client, choose Client transfer store instead (see “Follow one onboarding job from both sides”).
- You can have up to 250 dev stores. Delete ones you no longer need to make room.
- Every plan of your own app is free on your dev stores. Other apps' paid plans are free only if they are marked “Free for partners”.
- Storage is the Basic plan's: 100 GB of files, 50 GB of video, and 250 videos and 3D models.
- Dev stores are free and publish nothing to the Theme Store or App Store.
Open the store admin
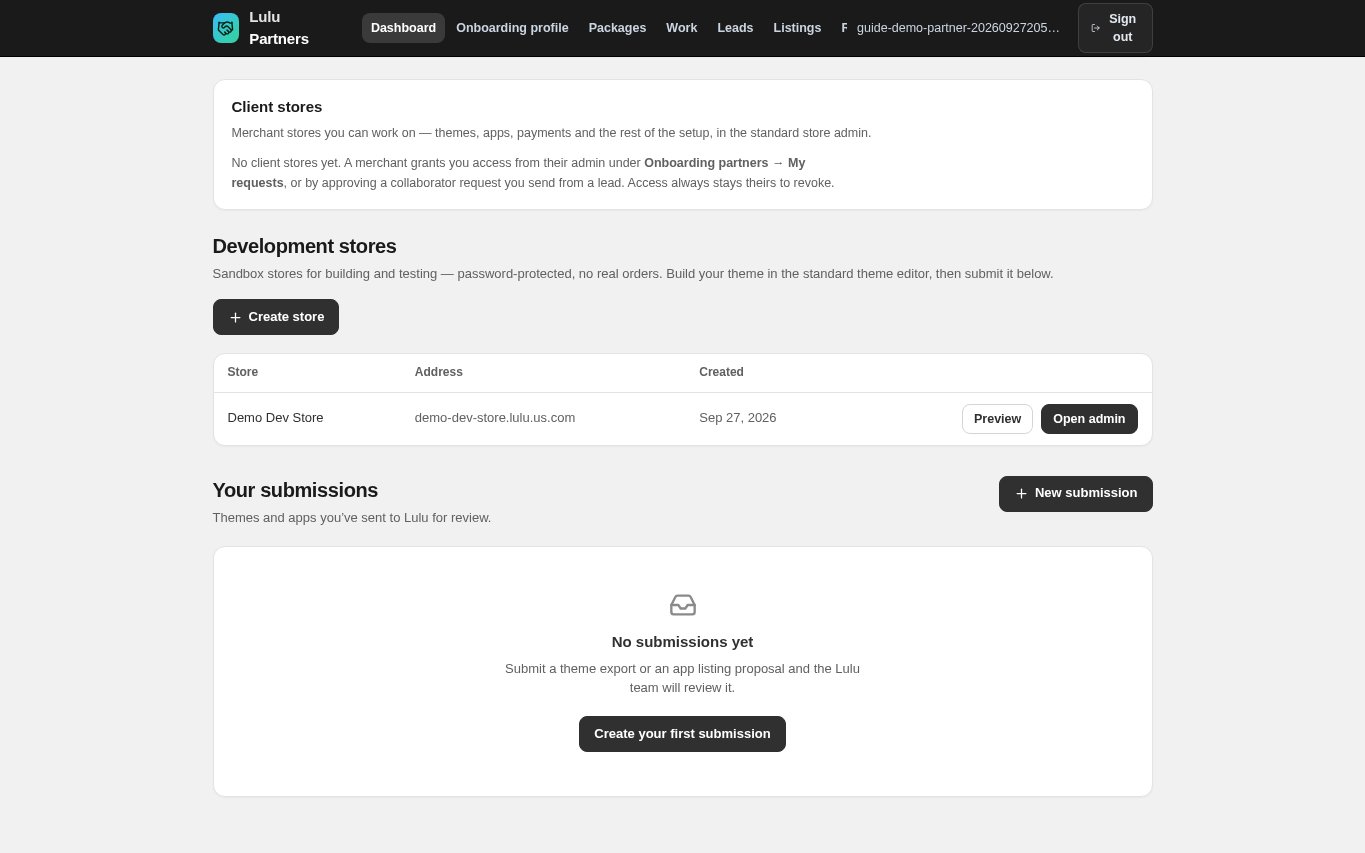
On the store's row select Open admin. The store admin opens in a new tab and signs you in automatically. Preview opens the storefront instead.
- Open admin is a single-use sign-in link, so you never need the store's password.
- You enter as a Collaborator named after your partner account, not as the store owner, so the store's activity log shows your work.
- Use only demonstration products and customer details in a dev store.
Pick a built-in theme to start from
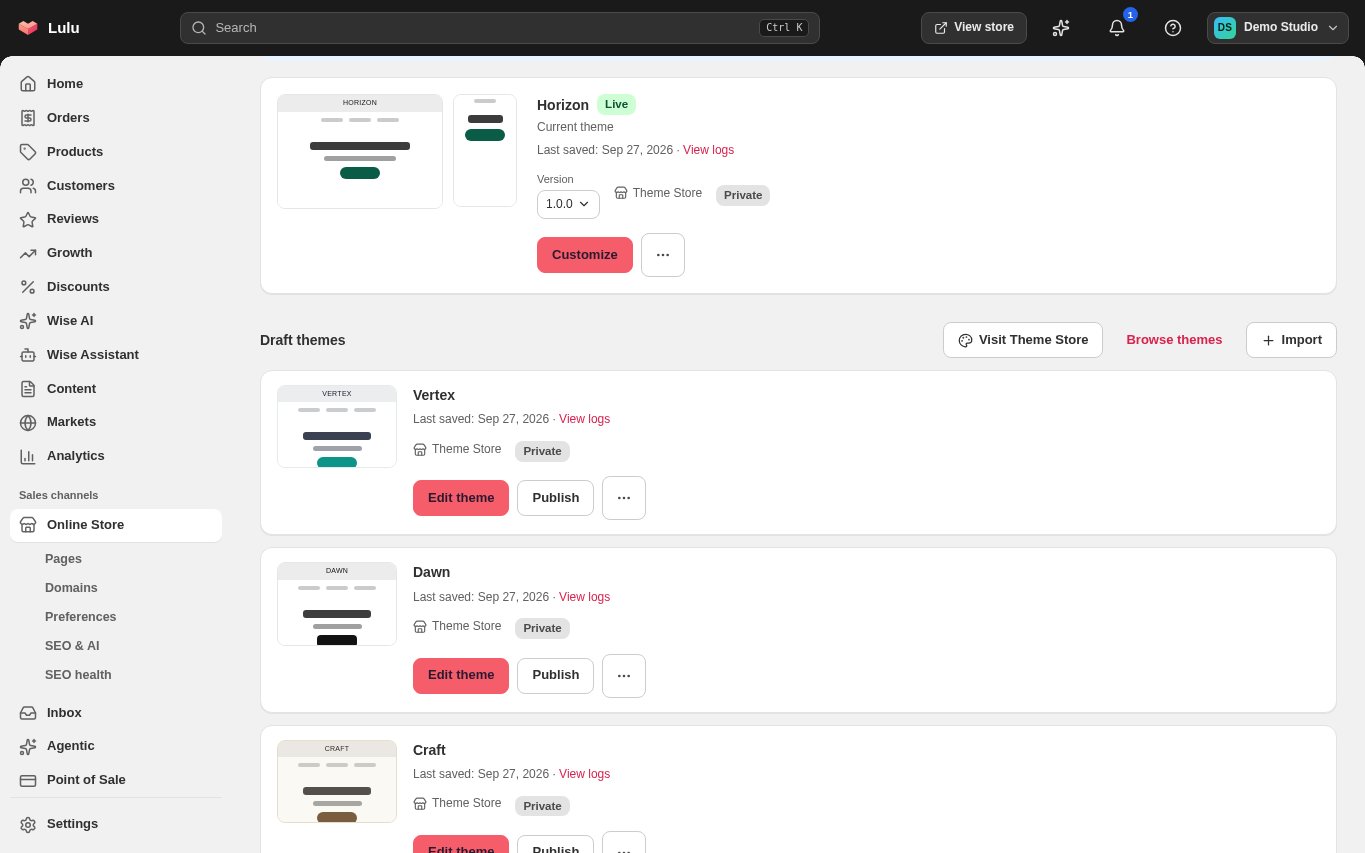
In the store admin select Online Store. The live theme is at the top; built-in Lulu themes are already installed under Draft themes. Choose the one closest to the design you want.
- Starting from a draft keeps the storefront stable while you work.
- You can add more free themes from the Theme Store link on the same page. A store holds up to 20 themes.
- A paid Theme Store theme stays a trial on a partner store: you can customise and preview it, but its code (custom.js and head snippets) is read-only and it can't be published. The client buys it after the transfer. Start from a free theme.
Build the theme in the theme editor
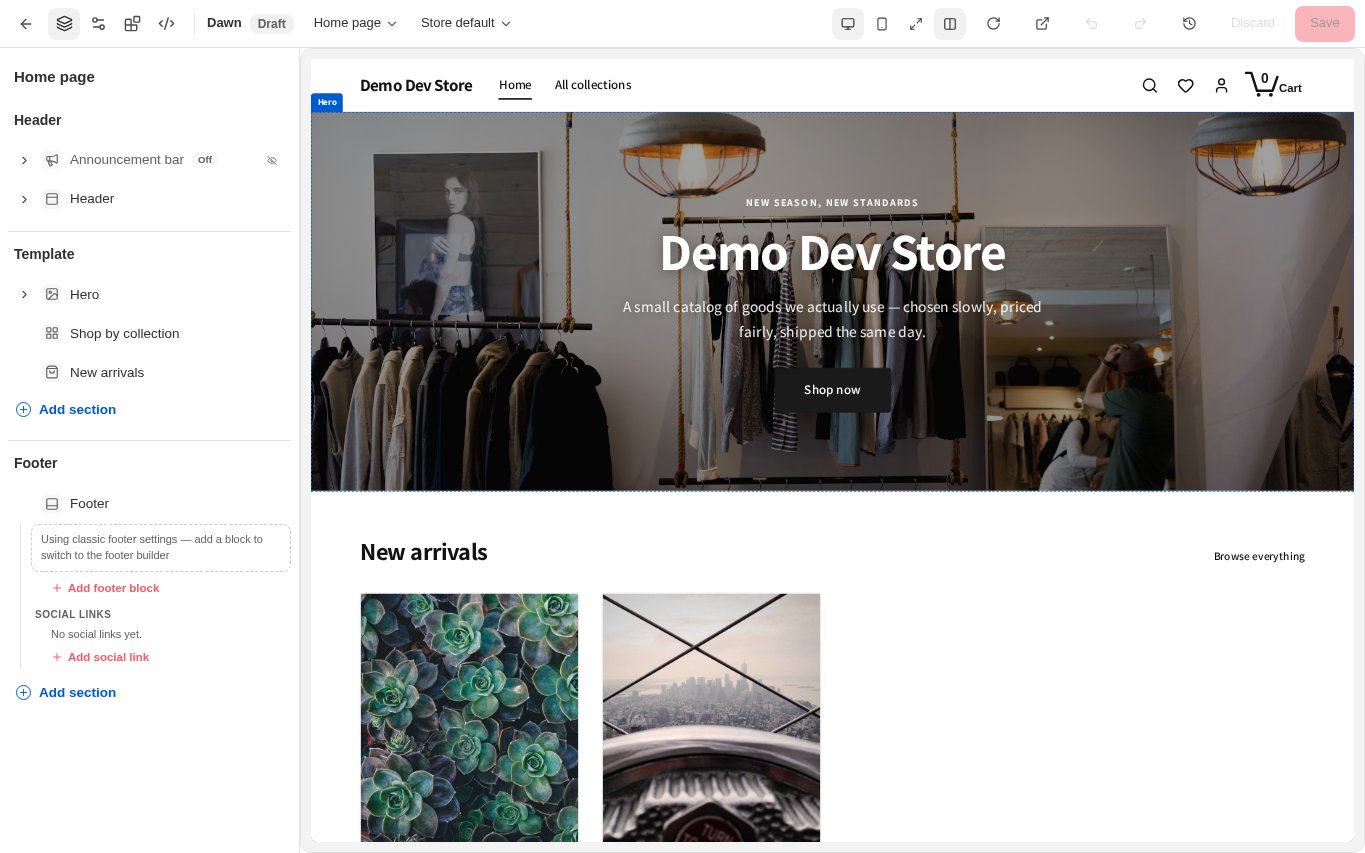
Select Edit theme on the draft. The same theme editor merchants use opens: sections and blocks on the left, a live preview in the middle, settings for the selected item on the right. Select Save when the preview looks right.
- Add, reorder, hide and configure sections and blocks for each page type.
- Theme settings hold the colours, typography, buttons, cards and layout rules for the whole theme.
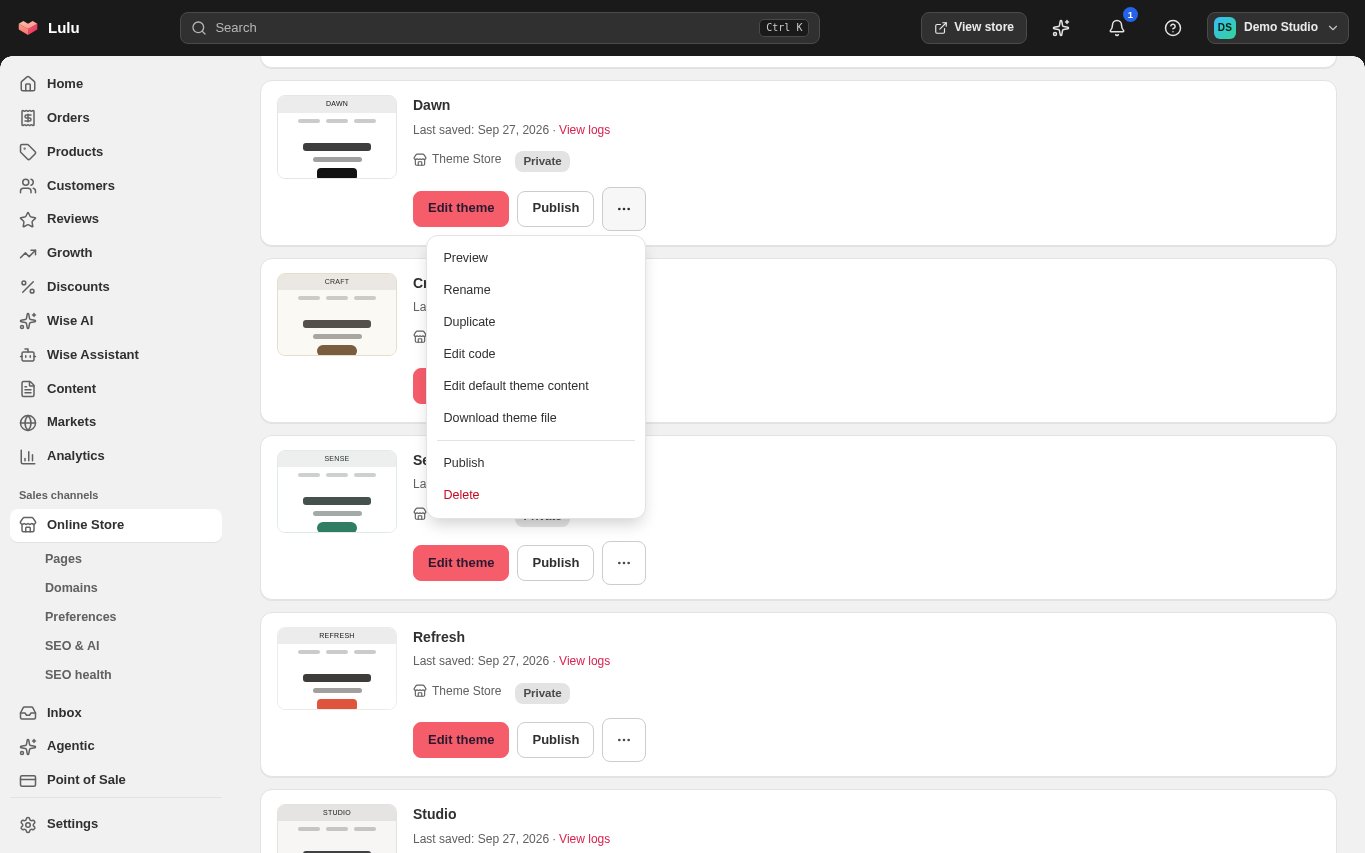
- Custom CSS, custom JavaScript and head snippets live under the theme's “…” menu → Edit code.
- Open Preview and check the real storefront on a phone and a desktop, not only the editor preview.
Download the theme file
Back on Online Store, open the “…” (Theme actions) menu on your theme and select Download theme file. You get a zip named theme_export__<store>__<theme>__<date>.zip.
- shopwise-theme.json at the root of the zip is the main file Lulu reads when you upload it again. You can also edit config/settings_data.json, templates/*.json, config/groups.json and assets/custom.css: an edited copy is used, an untouched one changes nothing. sections/*.json, the READMEs, custom.js and head-snippets.html are for reading only (see “Theme package format reference”).
- Keep every zip you release: published packages have no stored history and no rollback.
- Liquid themes from other platforms are not Lulu packages and are refused.
Start a theme submission
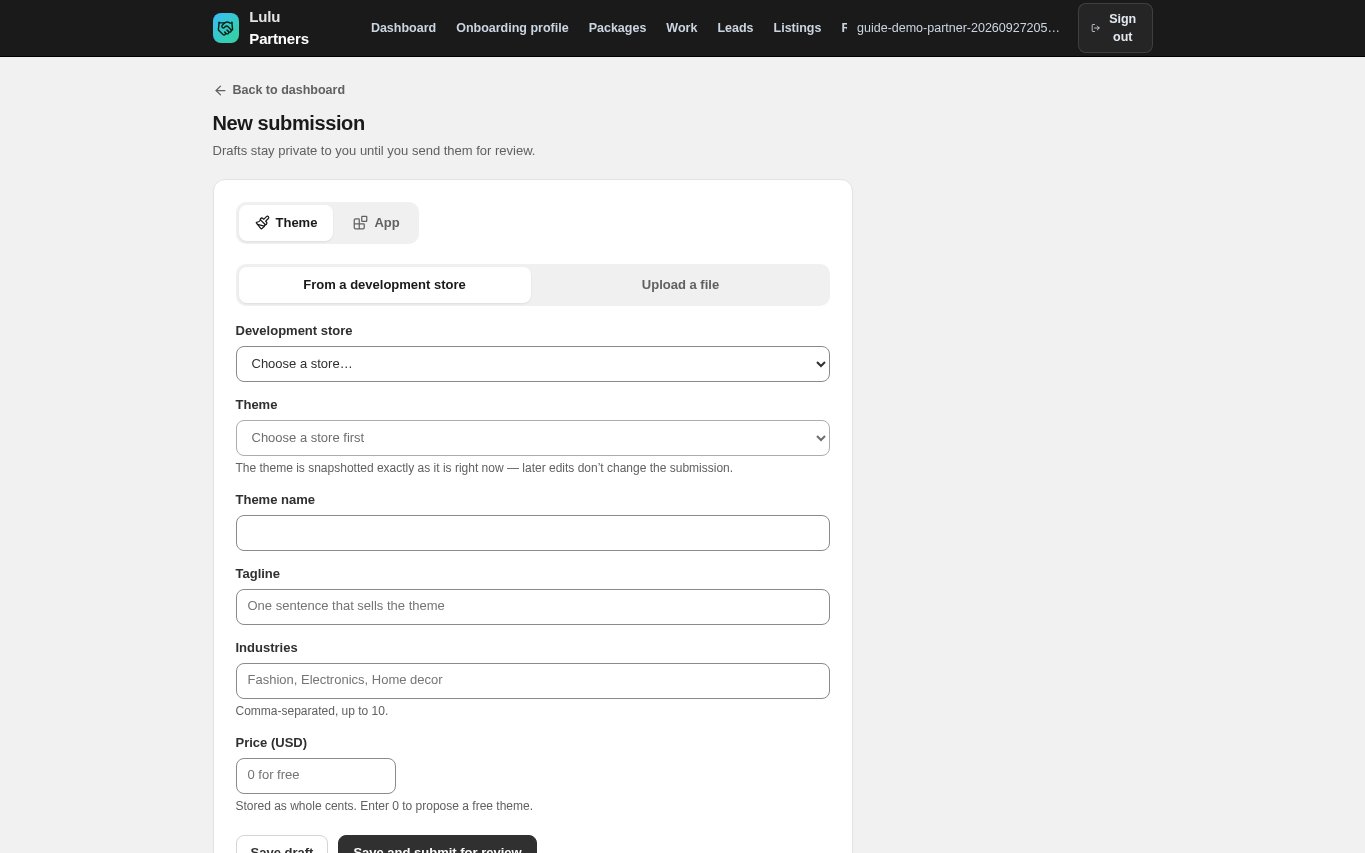
In the partner portal select New submission on the Dashboard. Keep Theme selected at the top of the form.
- The form says it plainly: drafts stay private to you until you send them for review.
- Every theme and every app is reviewed by the Lulu team before it goes public.
Choose where the theme comes from
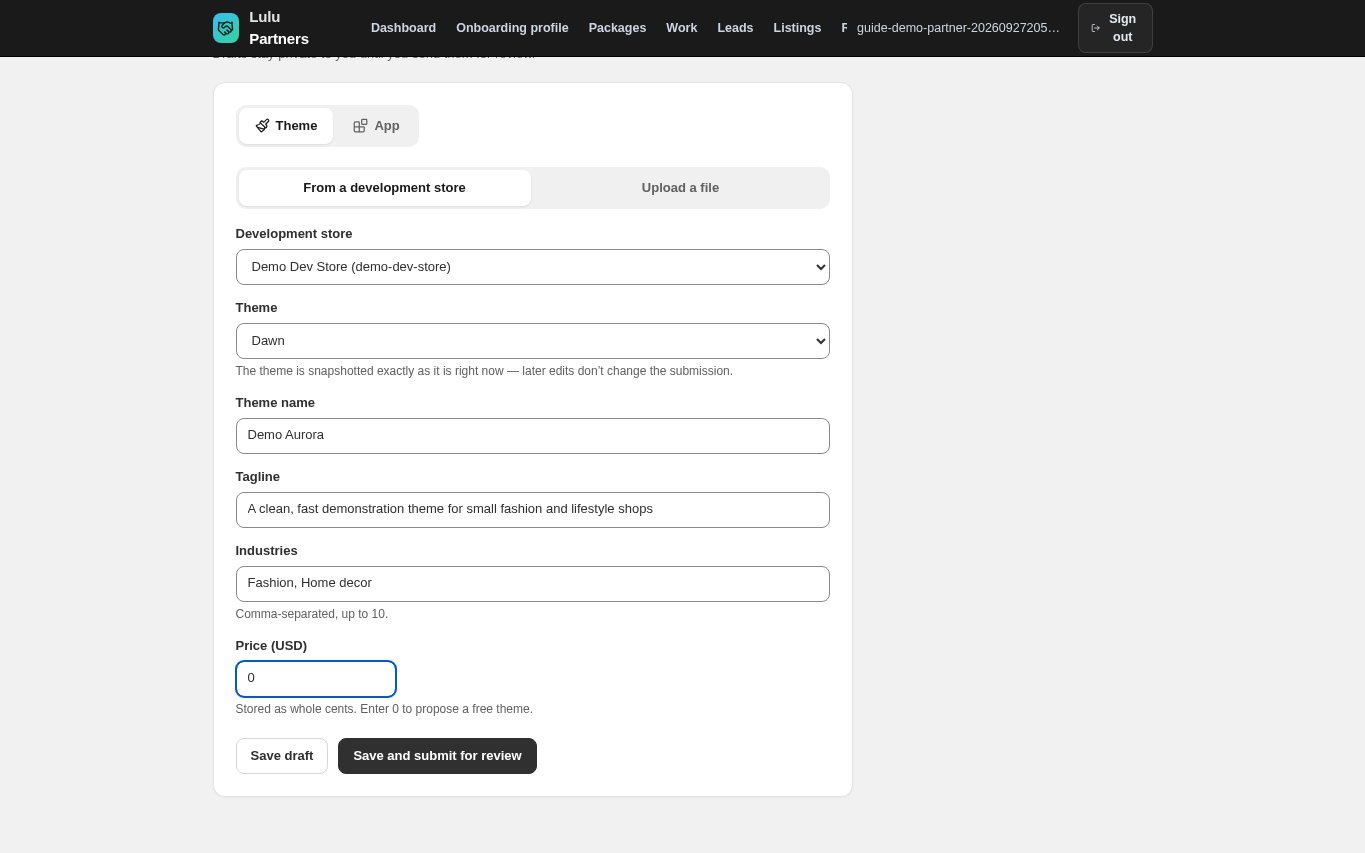
Select From a development store, then choose the Development store and the Theme. Or select Upload a file and choose your zip.
- From a development store: the theme is copied exactly as it is at that moment. Later edits in the store do not change the submission.
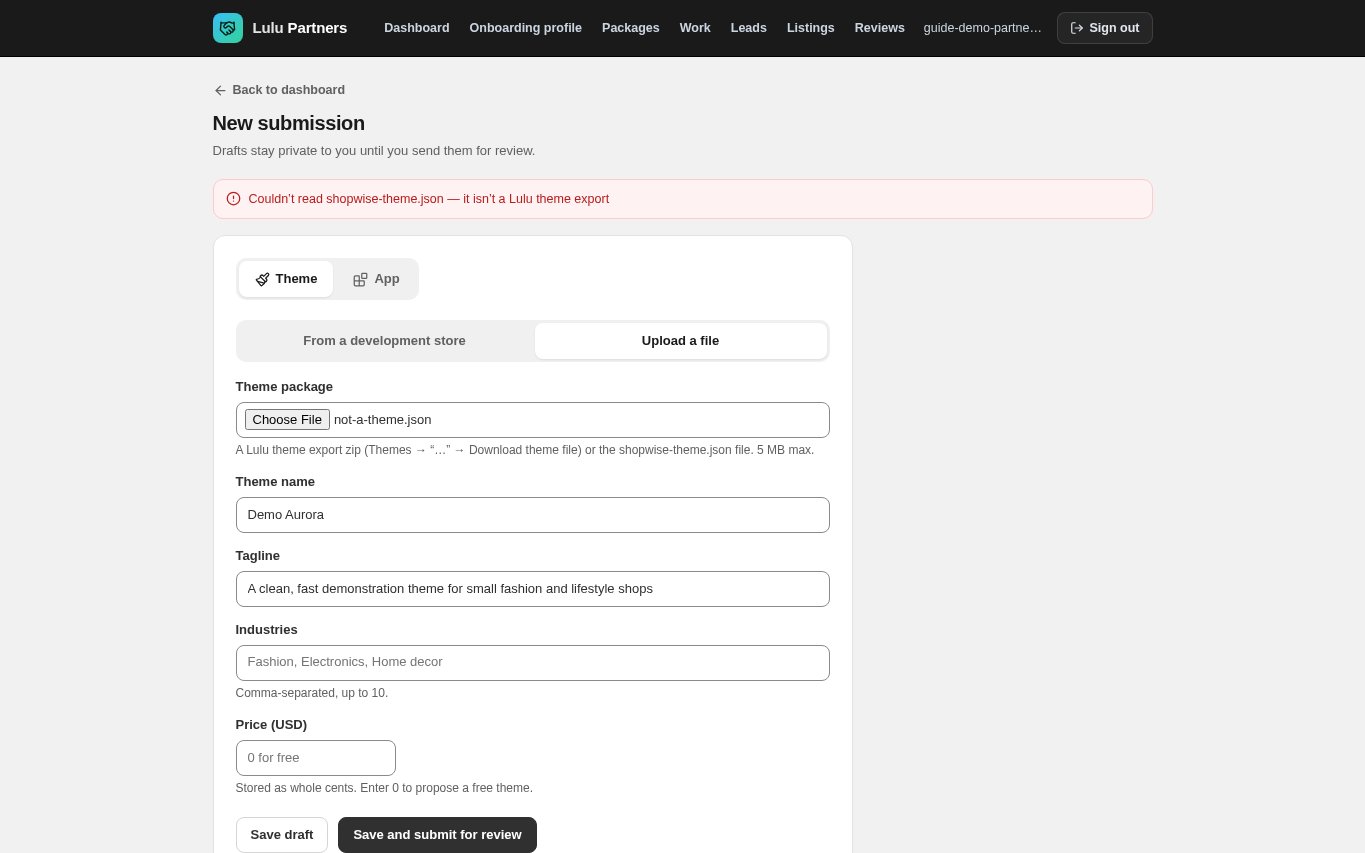
- Upload a file: a Lulu theme export zip or the shopwise-theme.json file on its own, 5 MB at most.
- A file that is not a Lulu theme is refused with a message saying why, and no draft is saved.
- Images uploaded in that store are copied into the package automatically.
- SVG images referenced by the theme are refused. Use PNG or WebP instead.
Fill in the theme listing details
Enter Theme name (up to 120 characters), a one-sentence Tagline (up to 200), Industries separated by commas (up to 10) and Price (USD). Then upload a Desktop screenshot (required, 1600×1000 recommended) and, optionally, a Mobile screenshot.
- Enter 0 in Price to offer the theme for free.
- Price is in US dollars.
- A paid theme is sold to merchants by Lulu at that one-time price. You receive a share of each sale; the live percentage is shown under the Price field and on the Program page, and it is paid with your partner payouts.
- Description, features, version and support details are added on the Listings page after approval; the screenshots you uploaded with the submission are carried over and can be replaced there.
- A desktop screenshot upload is required before you can submit. The mobile screenshot is optional.
Send the theme for review
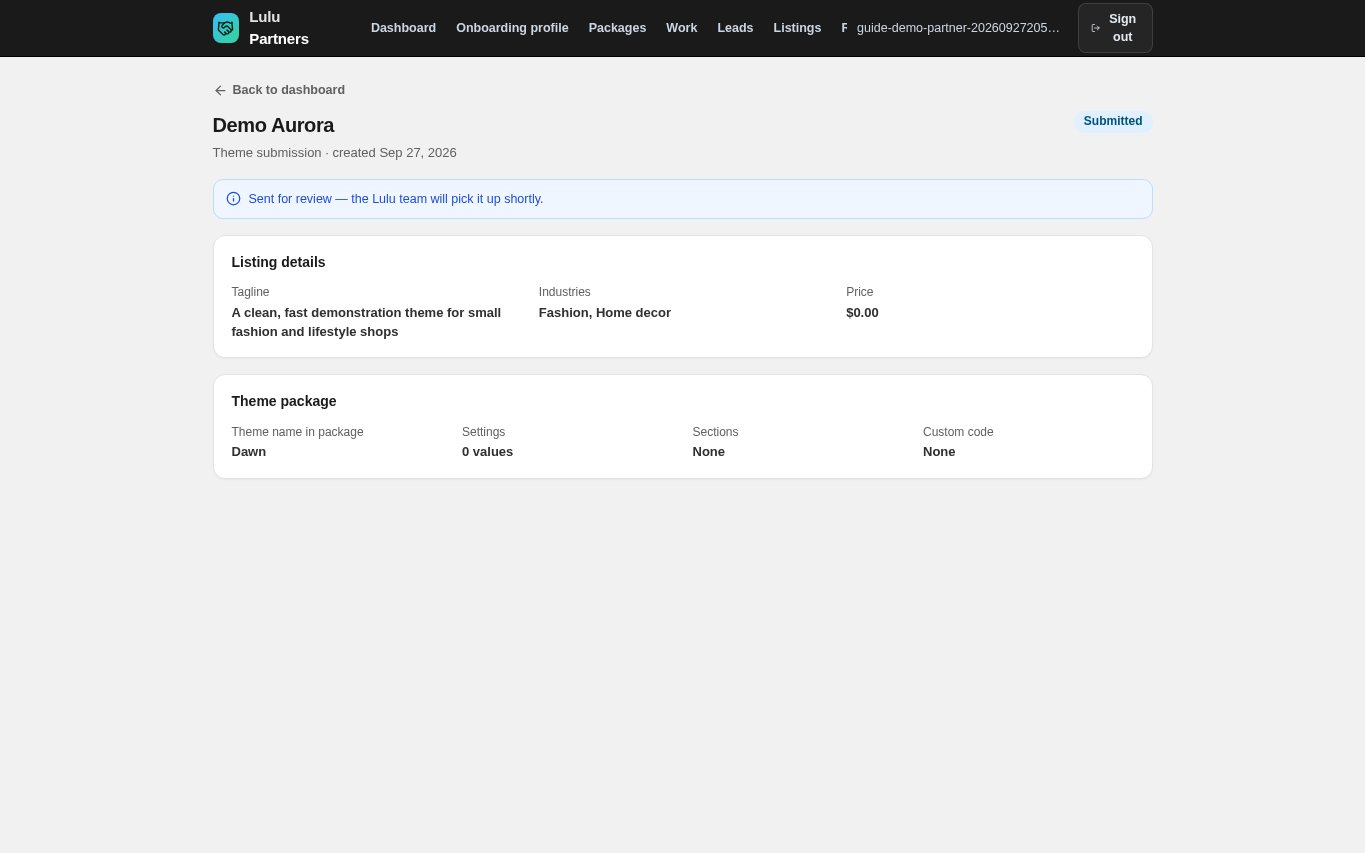
Select Save and submit for review. Or select Save draft, check the draft, and then select Submit for review on its page.
- The submission page shows Listing details and a Theme package summary: the theme name inside the package, how many settings it carries, and whether sections and custom code are included.
- Once submitted, the submission is locked while the Lulu team reviews it.
- The Theme package summary reads, for example, "Settings: N values (preset defaults)", and lists the section names and any custom code.
- You can edit and delete a draft at any time.
- While a submission waits for review you can withdraw it. It goes back to draft and you can edit it again.
- After approval, merchants can install the theme from the admin Theme Store with Try theme, and from the public theme page with Log in to add.
Understand what an app is here
A partner app is published as an App Store listing at apps.lulu.us.com and inside every merchant's admin App Store, marked as a partner app. The portal takes the listing text; there is no field for code, a callback URL, permissions or billing plans.
- The store data an app may view or edit (its scopes) is shown to merchants on the install consent screen. Lulu sets these with you; the portal cannot.
- Paid app plans and storefront embeds are also configured by Lulu.
- Never upload app code as a theme package. Agree the technical integration with the Lulu team before you promote the app.
Propose an app listing
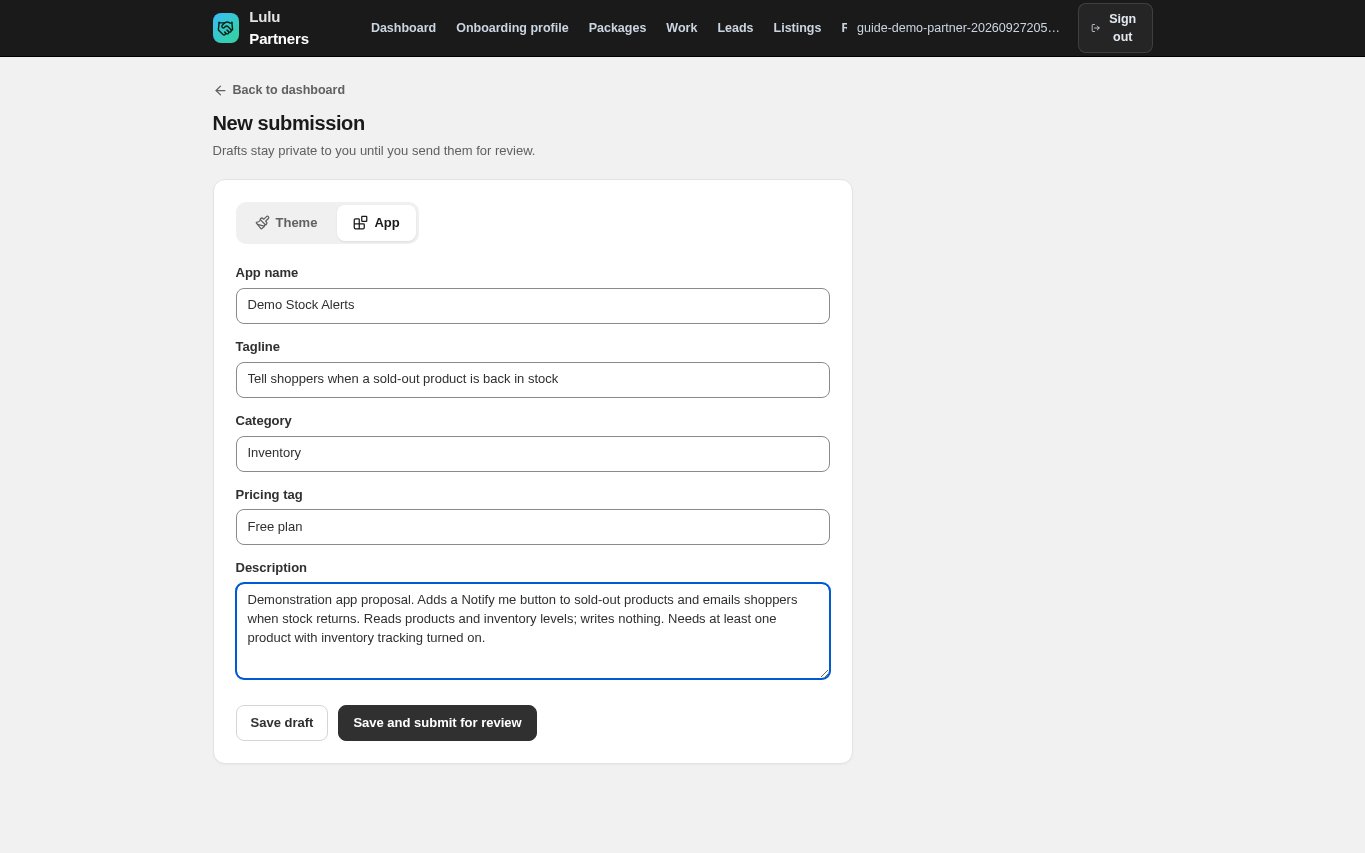
Select New submission, then App. Fill in App name (up to 120 characters), Tagline (up to 200), Category (up to 80), Pricing tag and Description (up to 5,000). All five are required.
- Category is free text, for example Marketing, Shipping or Store design.
- Pricing tag: type exactly one of Free, Free plan, Free to install or Free trial. Any other wording, including “Free plan available”, is published as Free.
- In Description say what the app does, who it is for, which store data it reads and writes, and what a merchant needs before it works.
Save the app draft and submit it
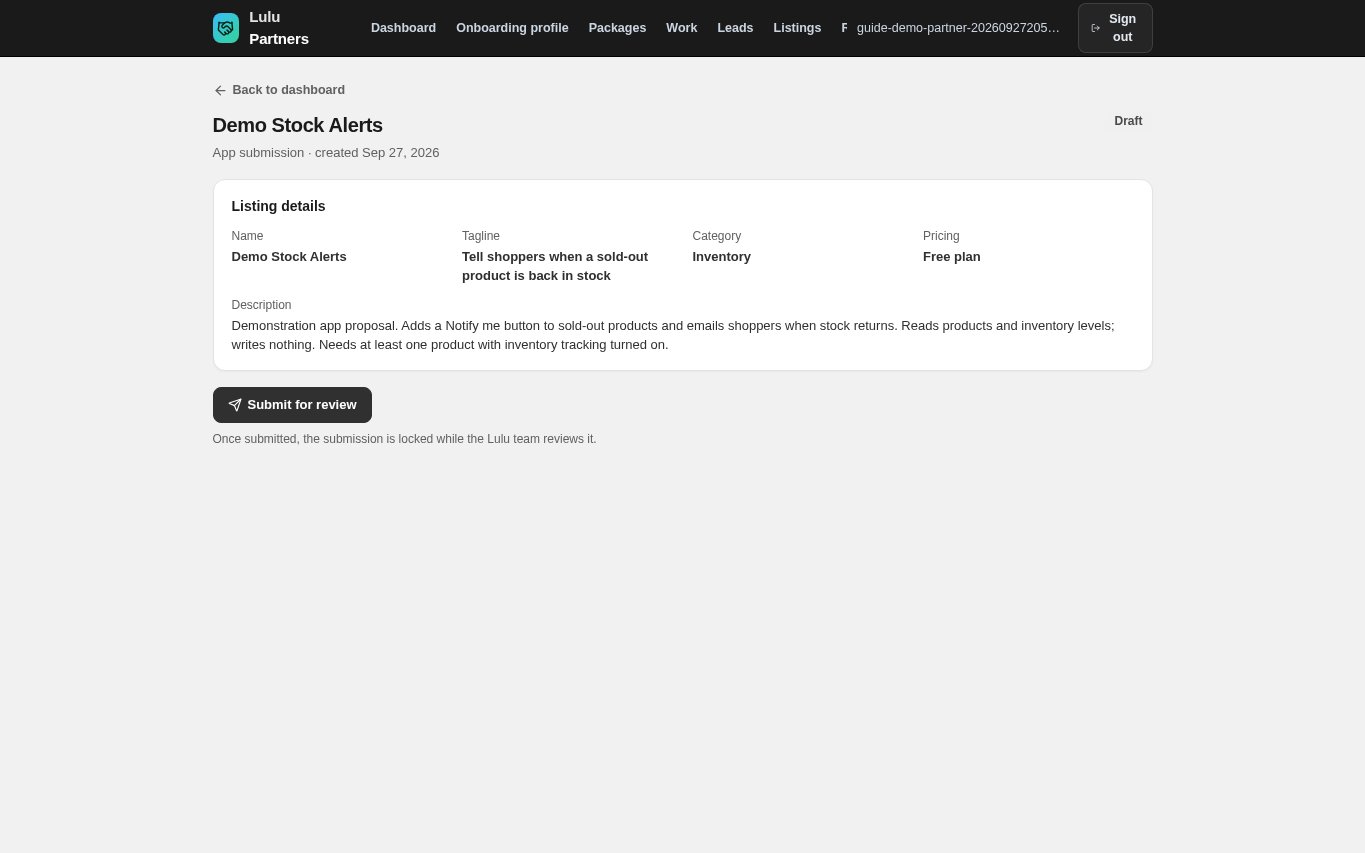
Select Save draft to check the proposal, then Submit for review on its page. Or select Save and submit for review straight away.
- A draft appears under Your submissions with the status Draft and is visible only to you.
- Once submitted it is locked while it is reviewed.
- You can edit and delete an app draft, and withdraw a submitted app back to draft while it waits for review.
Follow the review status
On the Dashboard, Your submissions lists every theme and app with its Type, Status, Created and Reviewed dates. Select a title to open it.
- Draft: private to you. Submitted: waiting in the queue. In review: a reviewer has picked it up.
- Approved: published. Rejected: the reviewer asked for changes.
- You are not emailed about a submission decision; check this list.
Act on a rejection
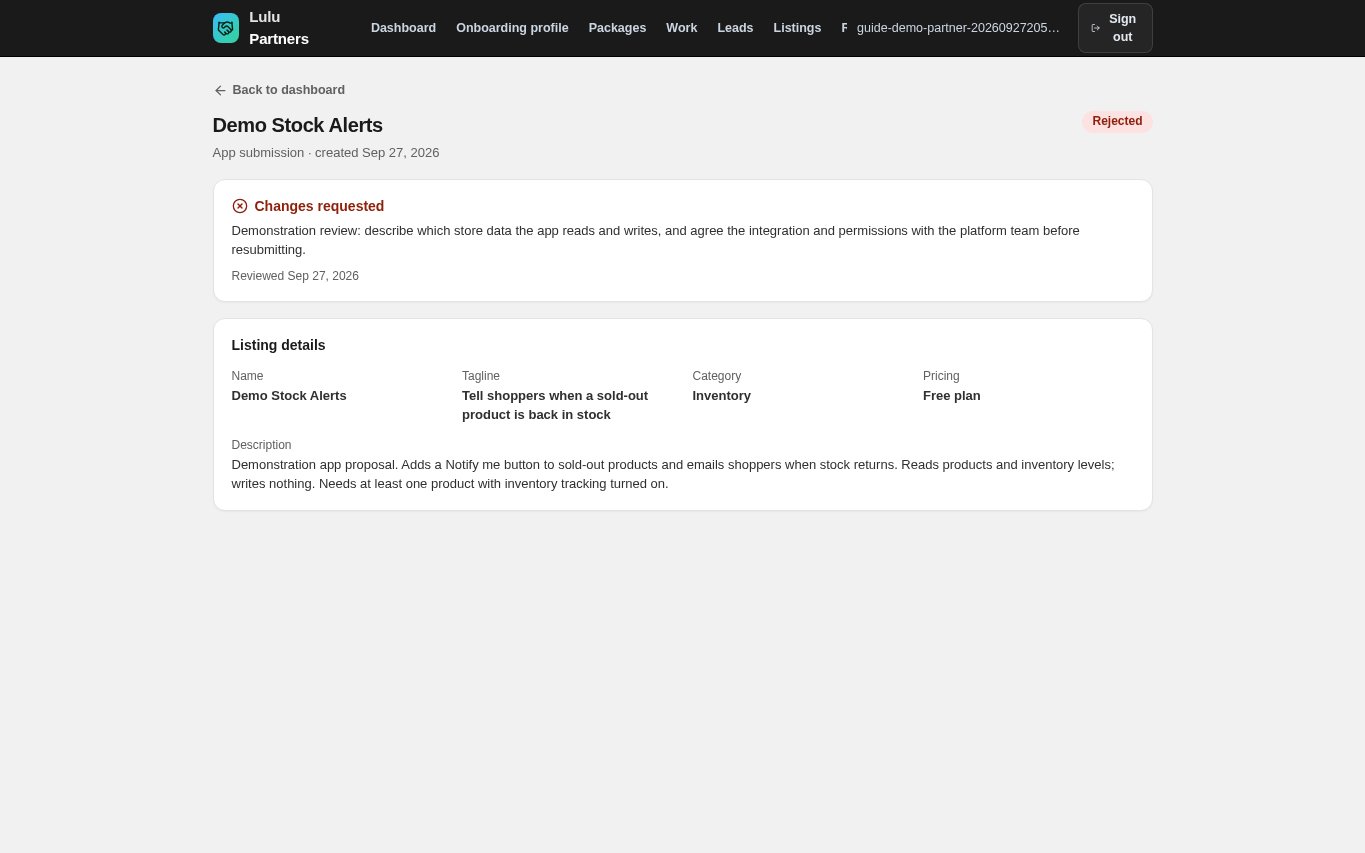
Open the rejected submission. Changes requested shows the reviewer's notes and the review date. Fix every point, then send a new submission.
- There is no resubmit button on a rejected submission; the corrected version is a new one.
- Keep the notes open while you prepare it so nothing is missed.
Find your published listing
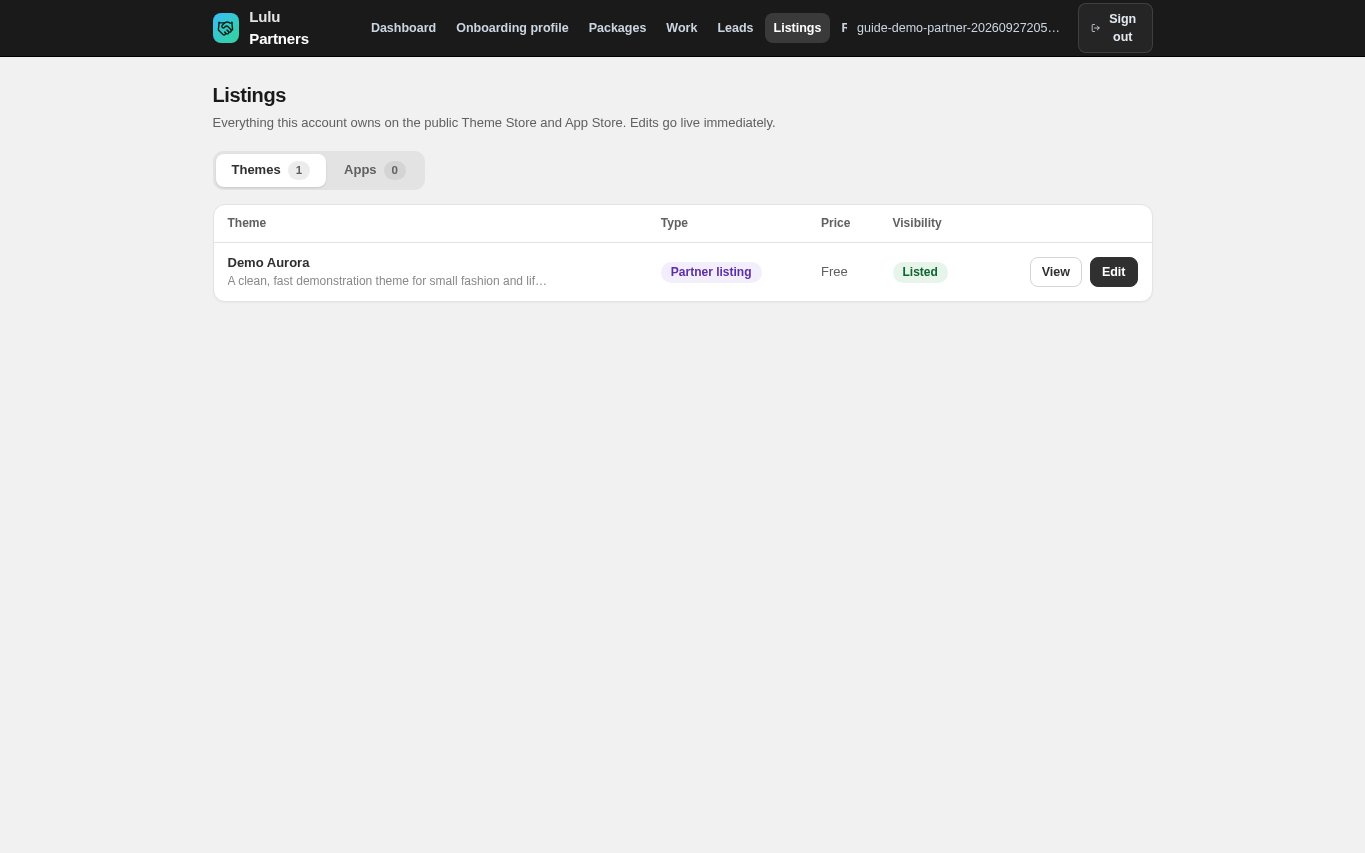
After approval, open Listings in the top bar. The Themes tab and the Apps tab list what you own, with Type, Price or Pricing, and Visibility. View opens the public page.
- Approval published the listing automatically; there is no separate publish step for you.
- A new theme listing starts with the submission screenshots but without a description, so complete the next step before you promote it.
- Listing edits go live immediately and are not reviewed again. Treat every save as a release.
- For an app, add the app link and screenshots in Listings → Apps first. Merchants can install the app (Open app) only once these are in place.
Complete the theme listing
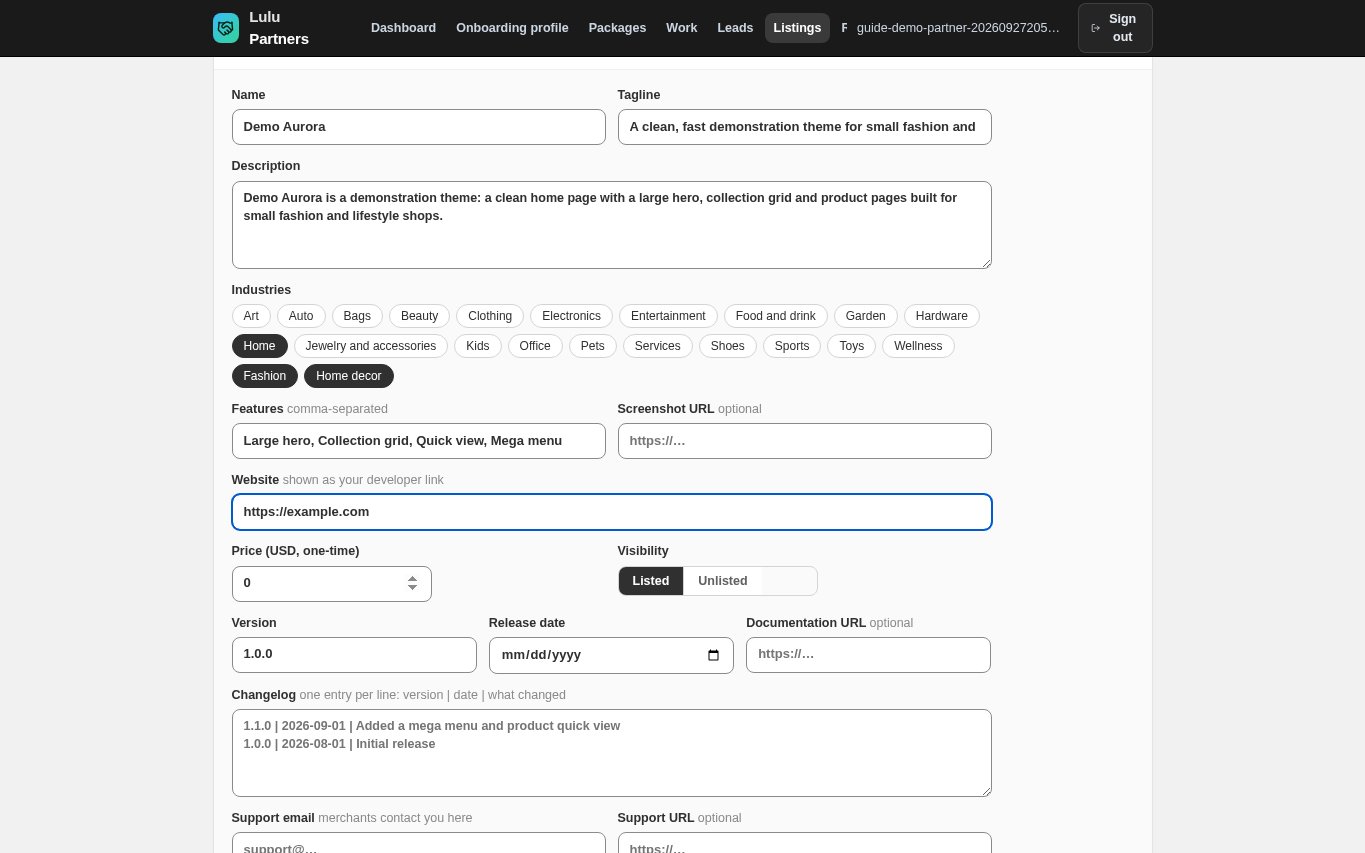
On the Themes tab select Edit on your theme. Fill in Name, Tagline, Description, Industries (select the chips), Features (comma-separated), Screenshot URL, Website, Price (USD, one-time) and Visibility, then select Save changes.
- Screenshot URL takes an https:// address of an image you host.
- Website becomes the developer link on your listing.
- Visibility Listed shows the theme in the Theme Store; Unlisted hides it straight away without deleting it.
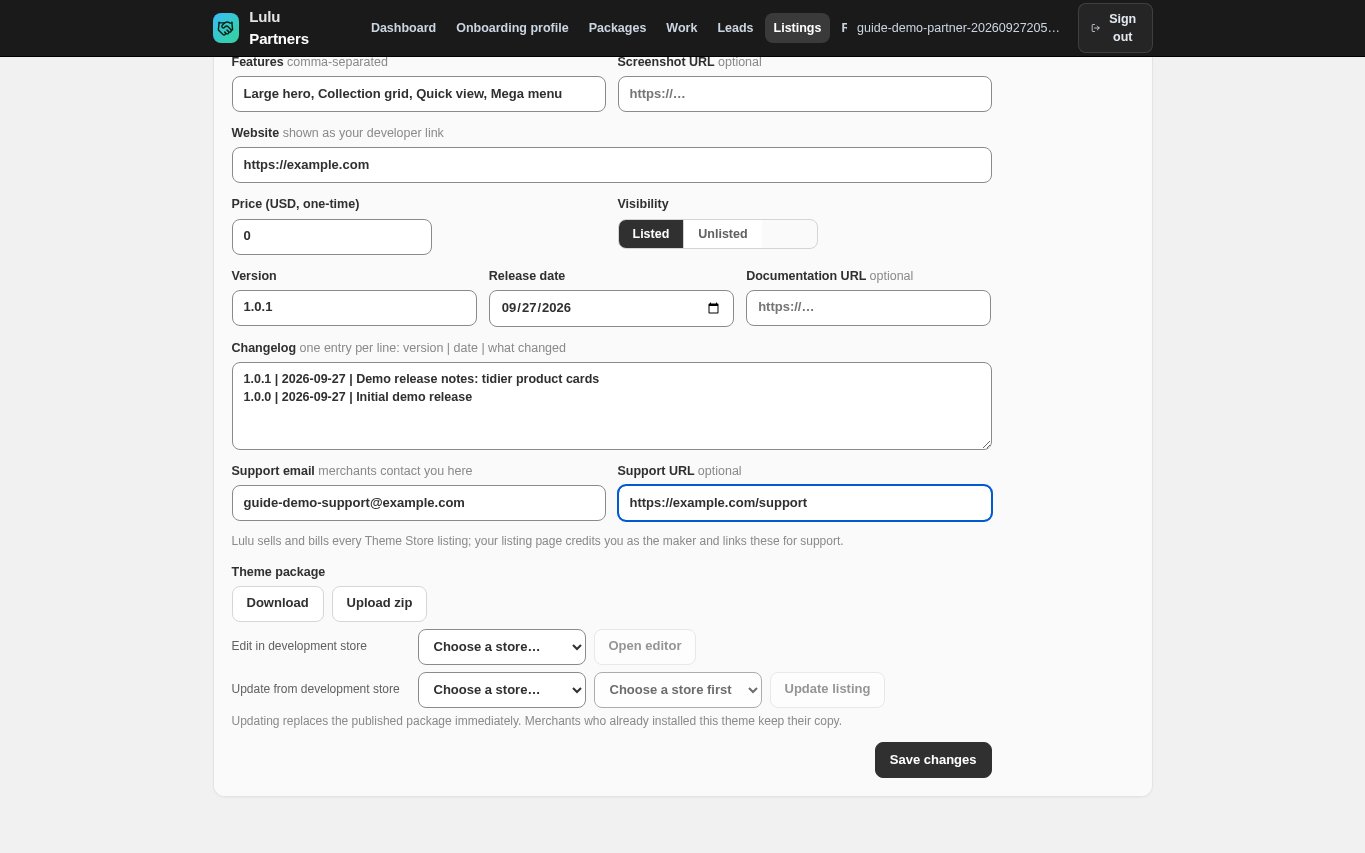
Add release and support details
In the same form fill in Version (for example 1.0.1), Release date, Documentation URL, Changelog, Support email and Support URL, then select Save changes.
- Changelog takes one line per release: version | date | what changed, up to 30 lines.
- Merchants read this block before installing, and it is how existing merchants learn that something changed.
Update the published theme
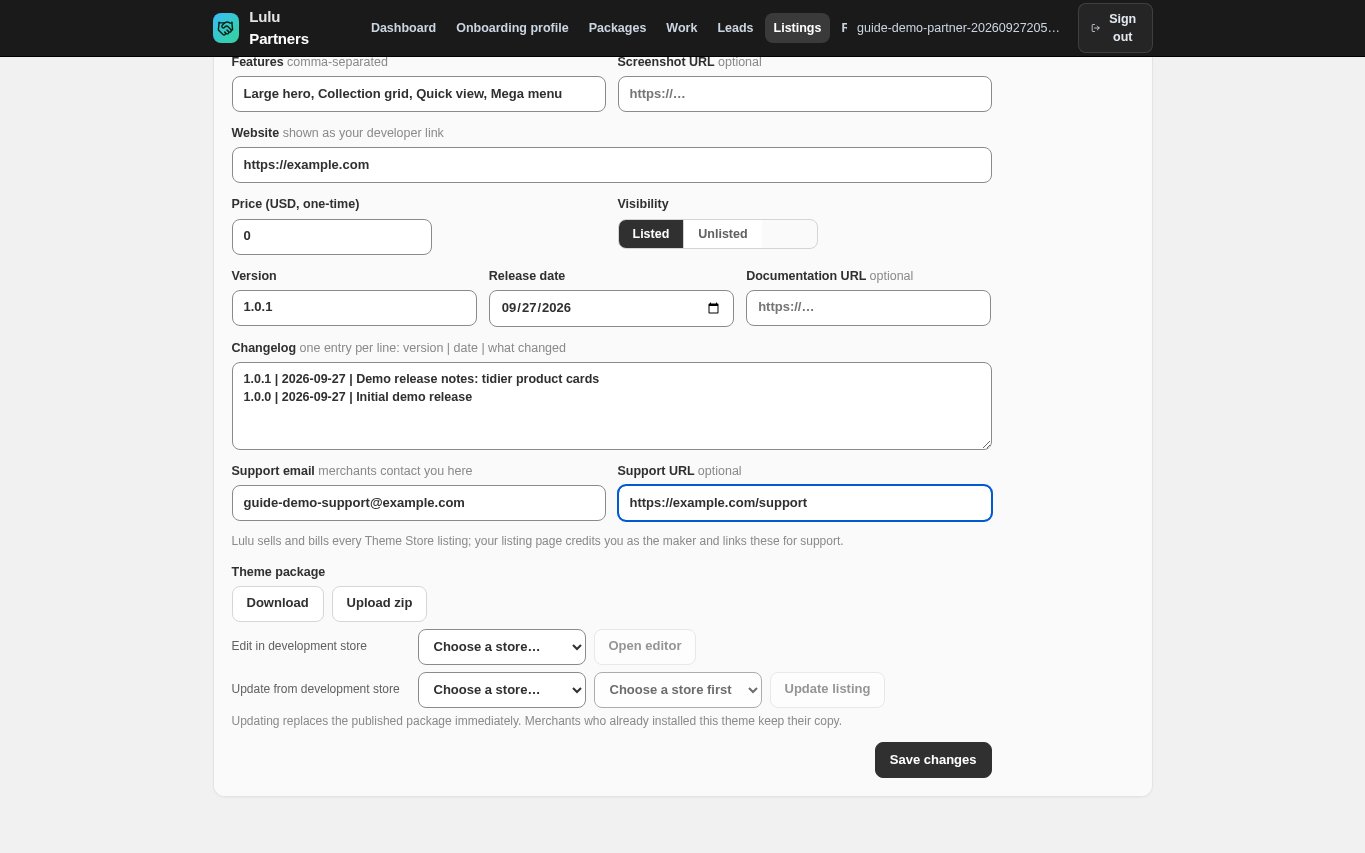
Under Theme package choose one route. Upload zip replaces the package with a tested export. Or choose a store in Edit in development store and select Open editor, make your changes, then pick that store and theme in Update from development store and select Update listing.
- Select Download first to keep a copy of the package you are replacing.
- Open editor installs your published package on the dev store as a fresh draft and opens the theme editor; it publishes nothing by itself.
- An update reaches new installations only. Merchants who installed earlier keep their own copy and customisations; tell them through Version and Changelog.
Maintain the app listing
On the Apps tab select Edit on your app. Update Name, Tagline, Description, Category, Pricing, Icon (an emoji or an image URL), Website, Support email, Support URL, Privacy policy URL and Documentation URL, then select Save changes.
- Pricing is a list here: Free, Free plan available, Free to install or Free trial. It is a label, not a billing plan.
- Every web address must start with https://.
- Changing permissions, plans or code still goes through the Lulu team.
Use app version history
Every save of an app listing is recorded under Version history, newest first. To go back, select Restore on an earlier entry.
- Restore copies that version back and records it as a new version (“Restored from v<n>”); history is never rewritten.
- Stores stay on the version they installed until their owner selects Update in their admin, so a restore does not roll back every store.
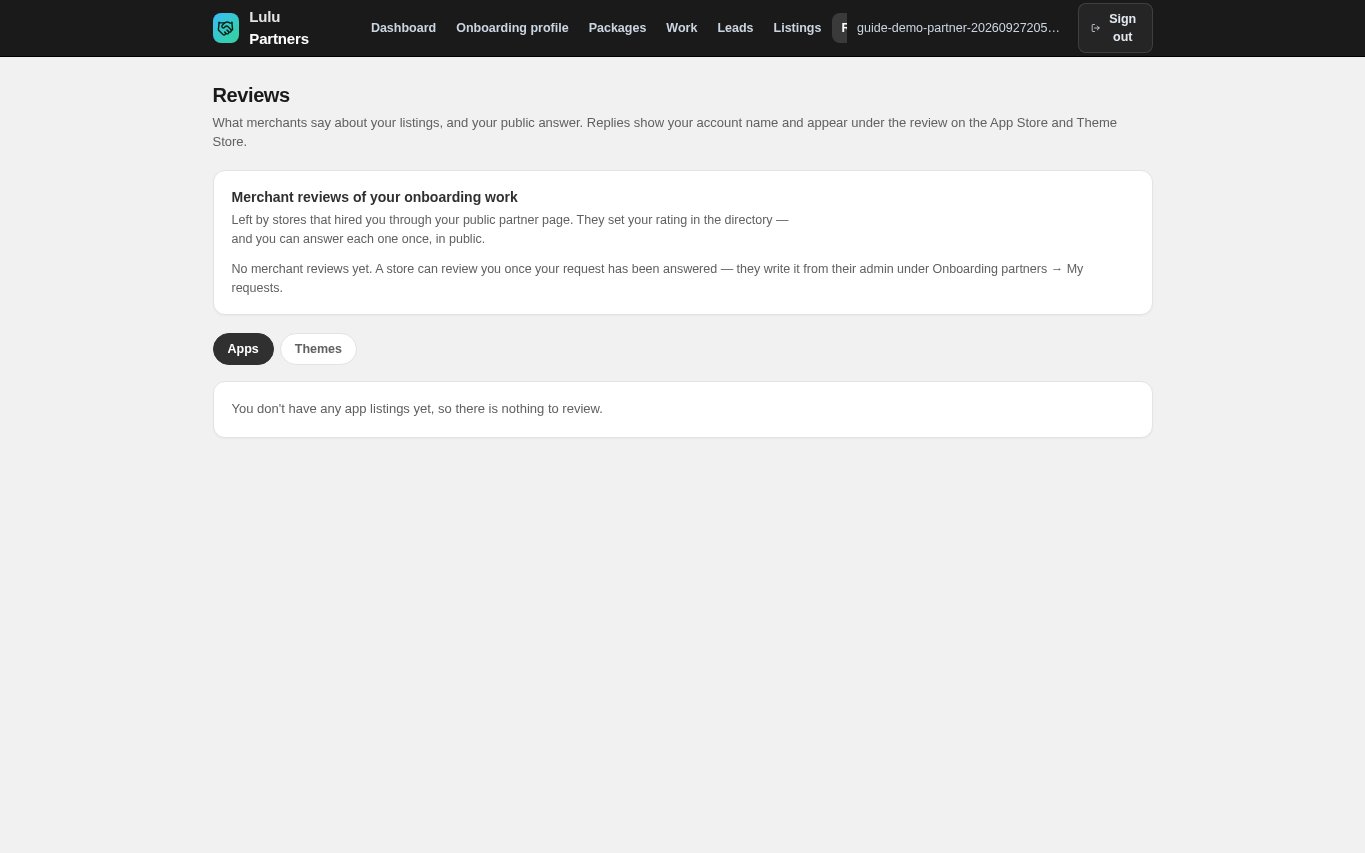
Read and answer merchant reviews
Open Reviews and switch between the Apps and Themes tabs. Select Reply under a review, write your answer and select Post reply. Use Edit reply to change it later.
- Replies are public and show your account name under the review on the App Store or Theme Store.
- Keep replies about the issue raised; never post customer data, order details or passwords.
Ask a merchant for a review
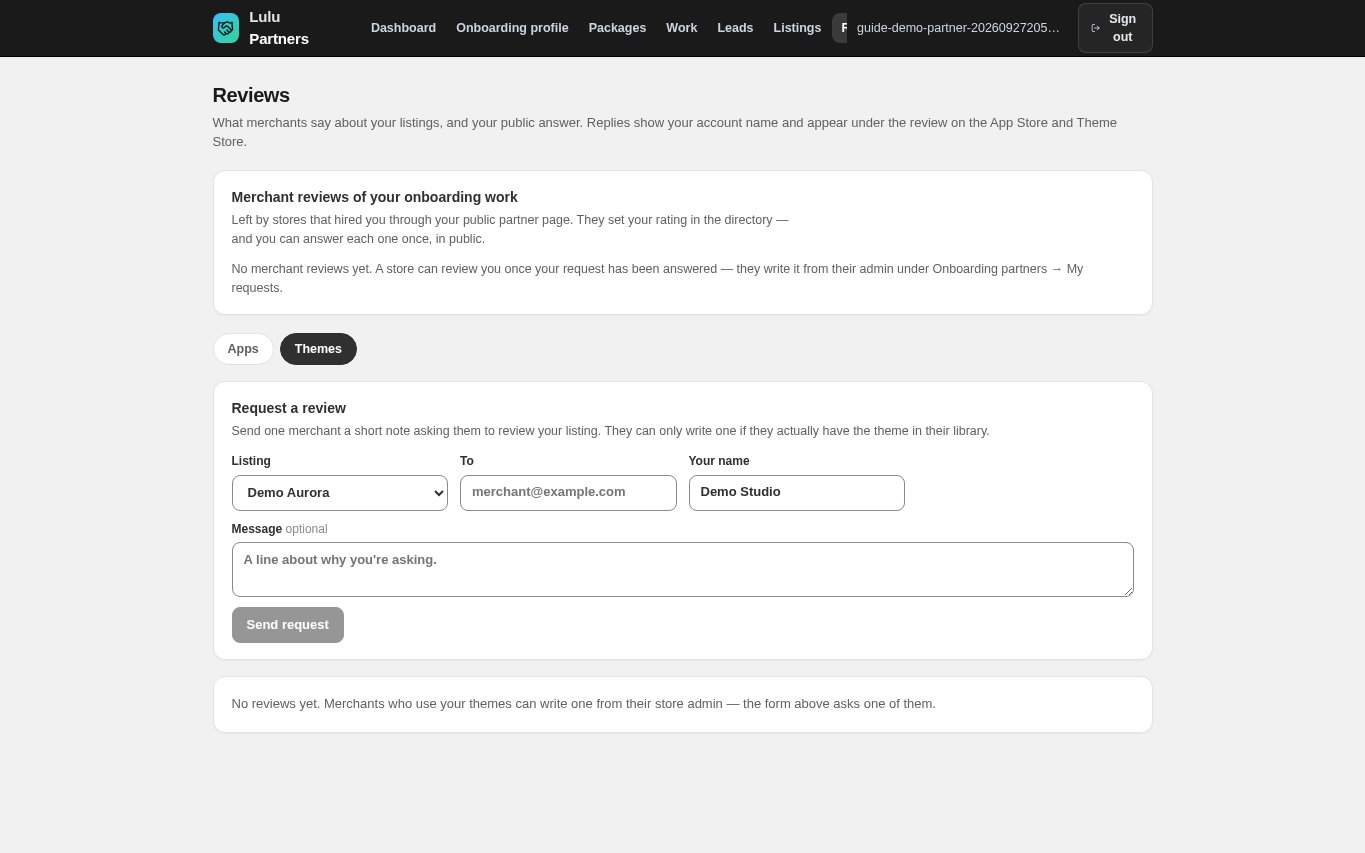
In Request a review choose the Listing, type the merchant's email address in To, enter Your name and an optional Message, then select Send request.
- Only merchants who have your app installed, or your theme in their store, can write a review.
Work in a merchant's store with collaborator access
To help a merchant in their own store, ask them for the 4-digit collaborator request code from their admin under Settings → Users → Collaborators. On a lead in Leads, enter it as Collaborator request code and select Request access. Once they approve, the store appears under Client stores on your Dashboard with an Open admin button.
- You always enter as a Collaborator; the merchant can suspend or remove your access at any time.
- Your own dev stores and client transfer stores need none of this — they are already yours.
- Default access does not include exporting customers, orders or a store backup. Ask the store owner to turn on what the job needs under Settings → Users → Collaborators → "Edit access".
- Without the matching export permission you also can't create an API token or a webhook that reads customers or orders in that store.
- Access you don't use for 90 days is removed. You get a warning email after 75 days; open the store admin to keep it.
- After 5 wrong request codes for a store, requests to that store are locked for 60 minutes.
CHECK YOUR WORK
You’re ready when…
- A dev store exists and opens from the Dashboard with Open admin.
- Your theme was built and checked on the real storefront, and you kept its zip.
- The theme submission and the app listing proposal were sent for review.
- After approval the theme listing has a screenshot, description, version, changelog and support details.
- The app's permissions, plans and integration were agreed with the Lulu team.
- You know how to update a theme package and restore an app version.
IF SOMETHING DOESN’T LOOK RIGHT
Troubleshooting
Create store says I have reached the limit.
You can have up to 250 dev stores. Delete dev stores you no longer need, then create a new one. Client transfer stores have no limit.
An app plan says "Not free on partner stores".
A paid app plan is free on your partner stores only if it is a free plan, a plan marked "Free for partners", or (on dev stores) a plan of your own app. Other paid plans show "Not free on partner stores" and can't be chosen; the store owner picks them after the transfer. On a dev store, every plan of your own app is free.
Open admin shows an error instead of the store.
The single-use link may have been used already; select Open admin again. For a client store, the merchant may have suspended your collaborator access, which only they can restore.
My theme upload was refused.
Only a Lulu theme export (a zip containing shopwise-theme.json, or that file alone) up to 5 MB is accepted. Download it again from Online Store → “…” → Download theme file and upload that file.
My later edits are not in the submission.
A submission is a snapshot taken when you saved it. Send a new submission, or after approval update the listing from Listings → Theme package.
My app shows as Free although I typed a different pricing tag.
Only Free, Free plan, Free to install and Free trial are recognised when an app is published. After approval, correct it with the Pricing list on Listings → Apps → Edit.
Where do I upload my app code or set its permissions?
Nowhere in the portal. It publishes the listing only. Agree the integration, the store data it needs and any paid plans with the Lulu team.
An existing merchant did not get my theme update.
Installed themes are the merchant's own copies and are never overwritten. Updates reach new installations; describe the change in Version and Changelog so existing merchants can decide to reinstall.
How do I take my theme out of the Theme Store?
Open Listings → Themes → Edit, set Visibility to Unlisted and select Save changes. For an app listing, contact Lulu support: apps cannot be unlisted from the portal.