



Connect your in-store POS system
For store owners who already sell in-store with their own POS software: connect it to your store so it can read your products and stock and send every sale it rings up into your Orders, with stock kept in step at the right location.
Download this guide: PDF · Word (.docx)
On this page
This guide is for store owners (or staff with the "Manage and install apps" permission). You need your POS software's settings screen open, and ideally your POS provider or developer at hand — your POS must support a Lulu or Shopify-style connection (most Shopify connectors work with a different shop address and token). If you use the Lulu register (Point of Sale in your admin) you don't need this guide — it is already connected.
Open Settings → Apps and sales channels → Develop apps
Sign in to your store admin, open Settings, then Apps and sales channels, then Develop apps. Near the top you'll see a card called "Connect a POS system".
- If you don't see the button, ask the store owner for the "Manage and install apps" permission.
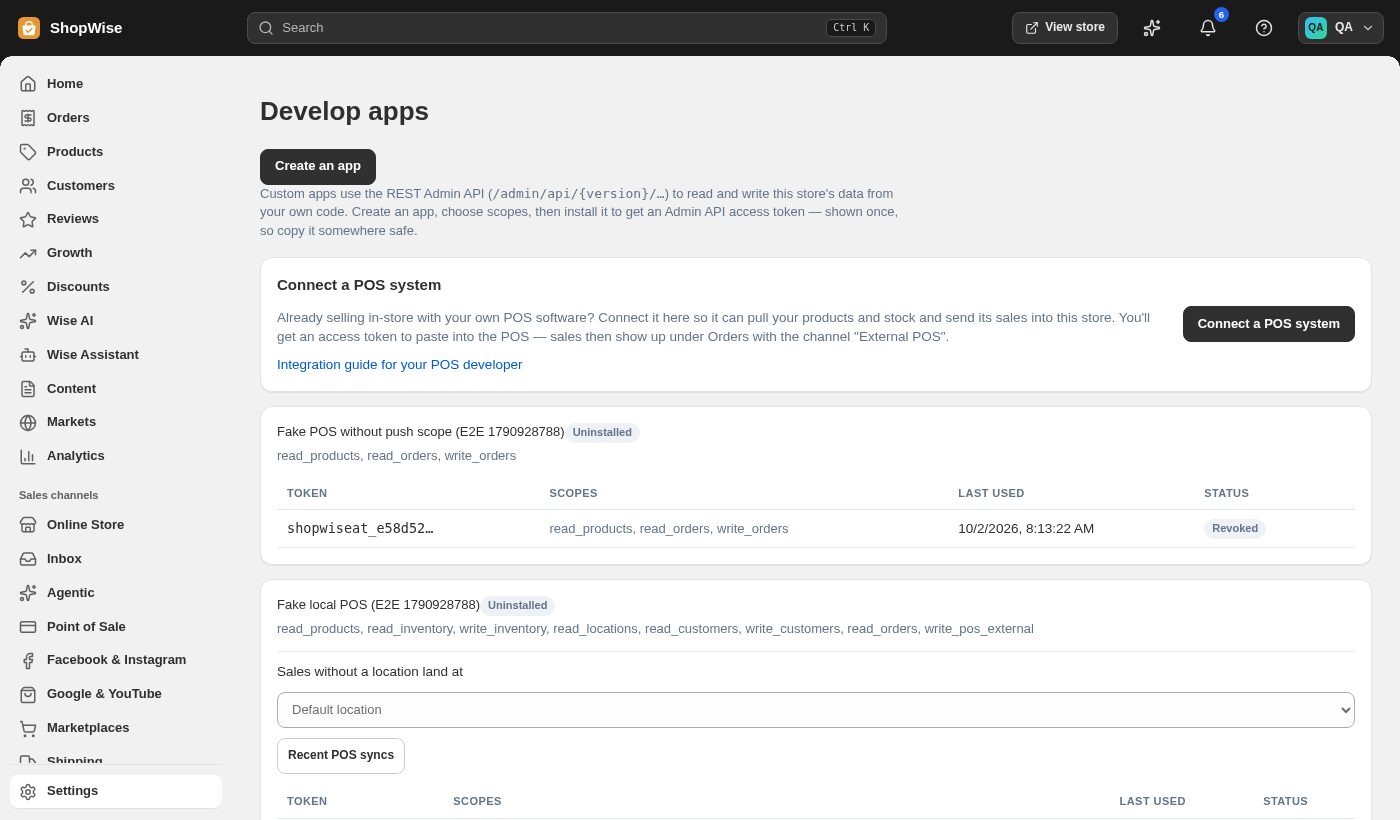
Click "Connect a POS system"
Give the connection a name you'll recognise (for example "Counter tills") and choose the store location the POS sells from. Sales the POS sends without naming a location are recorded at that location, and stock is taken from there.
- The access list is already filled in with exactly what a POS needs: read products, read and update stock, read locations, read and add customers, read orders, and send POS sales.
- You can untick extras such as adding customers — but "Send POS sales" must stay on.
Copy the access token
Click "Connect and get token". The access token is shown once — copy it straight away and keep it somewhere safe. If you lose it, click "Install (new token)" on the app card to make a new one and revoke the old one.
- Never share the token by email or chat — anyone who has it can send sales into your store.
Paste the token into your POS
In your POS software's connection settings, enter your store's address (your own domain or your store's web address) as the shop URL and paste the token. The POS then downloads your products and stock levels and starts sending each sale it completes. Your POS developer will find the full technical details in the developer guide linked on the card.
- Each sale carries the POS receipt number, so a sale that is sent twice (for example after the Wi-Fi drops) is only recorded once.
- Sales made while the POS was offline keep the time they actually happened.
Check that sales are coming in
Ring up a small test sale on the POS. Back on the Develop apps page, click "Recent POS syncs" on your POS app card — the sale appears there with its receipt number, location and total. It also shows under Orders: use the Channel filter and choose "External POS".
- Counter sales arrive as Paid and Fulfilled, and the stock at that location goes down.
- In Analytics, External POS sales have their own row under Sales by channel, and Point of Sale → Reports shows them in their own block — they are never mixed into Lulu register figures.
Change the location or disconnect later
On the app card you can switch which location sales land at. To disconnect the POS completely, click "Uninstall" — every token for it stops working immediately. Orders it already sent stay in your store.
CHECK YOUR WORK
You’re ready when…
- The POS app shows on Develop apps with an Active token.
- A test sale appears under Recent POS syncs and under Orders → Channel: External POS.
- Stock for the test item went down at the right location.
- The token is stored only in the POS settings.
IF SOMETHING DOESN’T LOOK RIGHT
Troubleshooting
My POS says the token is invalid.
Check that the shop address in the POS is this store's address — a token only works on the store it was made for — and that the token wasn't revoked or the app uninstalled. Make a new token with "Install (new token)" if in doubt.
A sale was refused because an item is out of stock.
Items set to stop selling when out of stock can't go below zero at that location. Correct the stock count in Products → Inventory (or from the POS), or let your POS developer send such sales with the option that records them even when the count disagrees.
Sales show up at the wrong location.
Change the location on the POS app card, or ask your POS developer to send the location with each sale.
A sale appears twice.
Each sale must carry its own receipt number. If your POS reuses or omits receipt numbers, ask your POS provider to send a unique receipt number (or an Idempotency-Key) with every sale.
Online orders don't reduce stock in my POS.
Your POS needs to listen for stock updates (the inventory_levels/update webhook) or check for changes regularly. The developer guide explains both.